Create a theme
You're ready to create a new theme. You might be asking yourself: How can I quickly set up my development environment and start coding?
In this tutorial, you'll use Shoplazza CLI and Nova 2023 to create a new theme and upload it to Shoplazza admin.
What you'll learn
After you've finished this tutorial, you'll have accomplished the following:
-
Set up your local development environment
-
Cloned Nova 2023, Shoplazza's reference theme
-
Previewed changes made to your local code
-
Pushed theme code to your Shoplazza store and published your theme
shoplazza theme initRequirements
- The URL of the store that you want to work on, such as
your-store.myshoplaza.com.
Installation requirements for Shoplazza CLI
The requirements to install and run Shoplazza CLI depend on your computer:
Step 1: Install Shoplazza CLI
Shoplazza CLI is a command-line tool that helps you to build Shoplazza themes. It lets you preview and share changes to themes while developing locally. Follow the instructions below to install Shoplazza CLI on macOS, Windows, or Linux.
npm install -g shoplazza-cliStep 2: Initialize a new theme using Nova 2023
Use shoplazza theme init to clone the Nova 2023 Git repository to your local machine.
- In a terminal, navigate to the working directory where you want to clone Nova 2023.
- Enter the following command:
shoplazza theme init- You're prompted to enter a name for your theme, such as
new-theme. The theme is cloned into a folder with the same name. - After the theme is cloned, navigate to the folder:
cd "new-theme"Step 3: Log in to your account
After initializing your theme, you can run shoplazza login to log in with your store account.
- Enter the following command:
shoplazza login - The terminal will ask you to enter the store link, enter your store URL (Eg.
https://ears.myshoplaza.com/). - After entering the URL, an authorization login page will automatically open in the browser, click Authorize Login.
- After the authorization is successful, the authorization success message will be displayed on the page:

Step 4: Start a local development server
After you log in to your account, you can run shoplazza theme serve to interact with the theme in a browser. Shoplazza CLI uploads the theme as a development theme on the store.
The command returns a URL that hot reloads local changes to CSS and sections, allowing you to preview changes in real-time using the store's data. This preview is only available in Google Chrome.
- To serve your theme, run the following command.
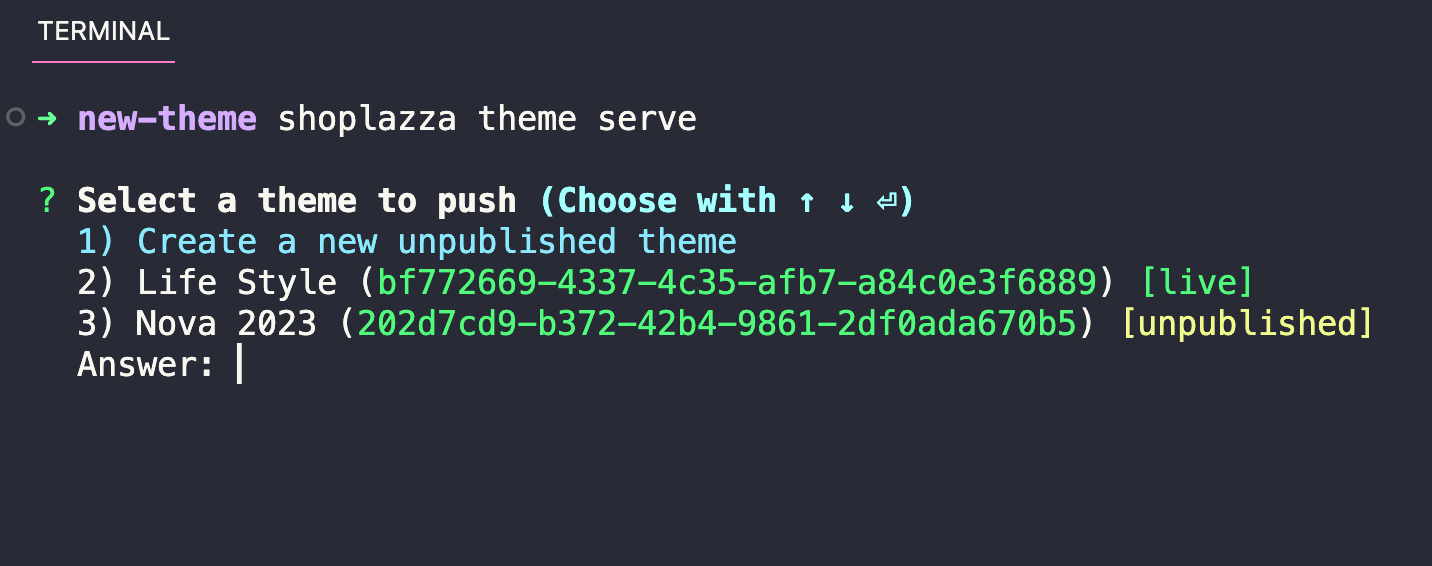
shoplazza theme serve- The following image shows a selection to select a theme to push, to select
Create a new unpublished themeto create a new theme for development:
- The following image shows a development server is started using the
serve:
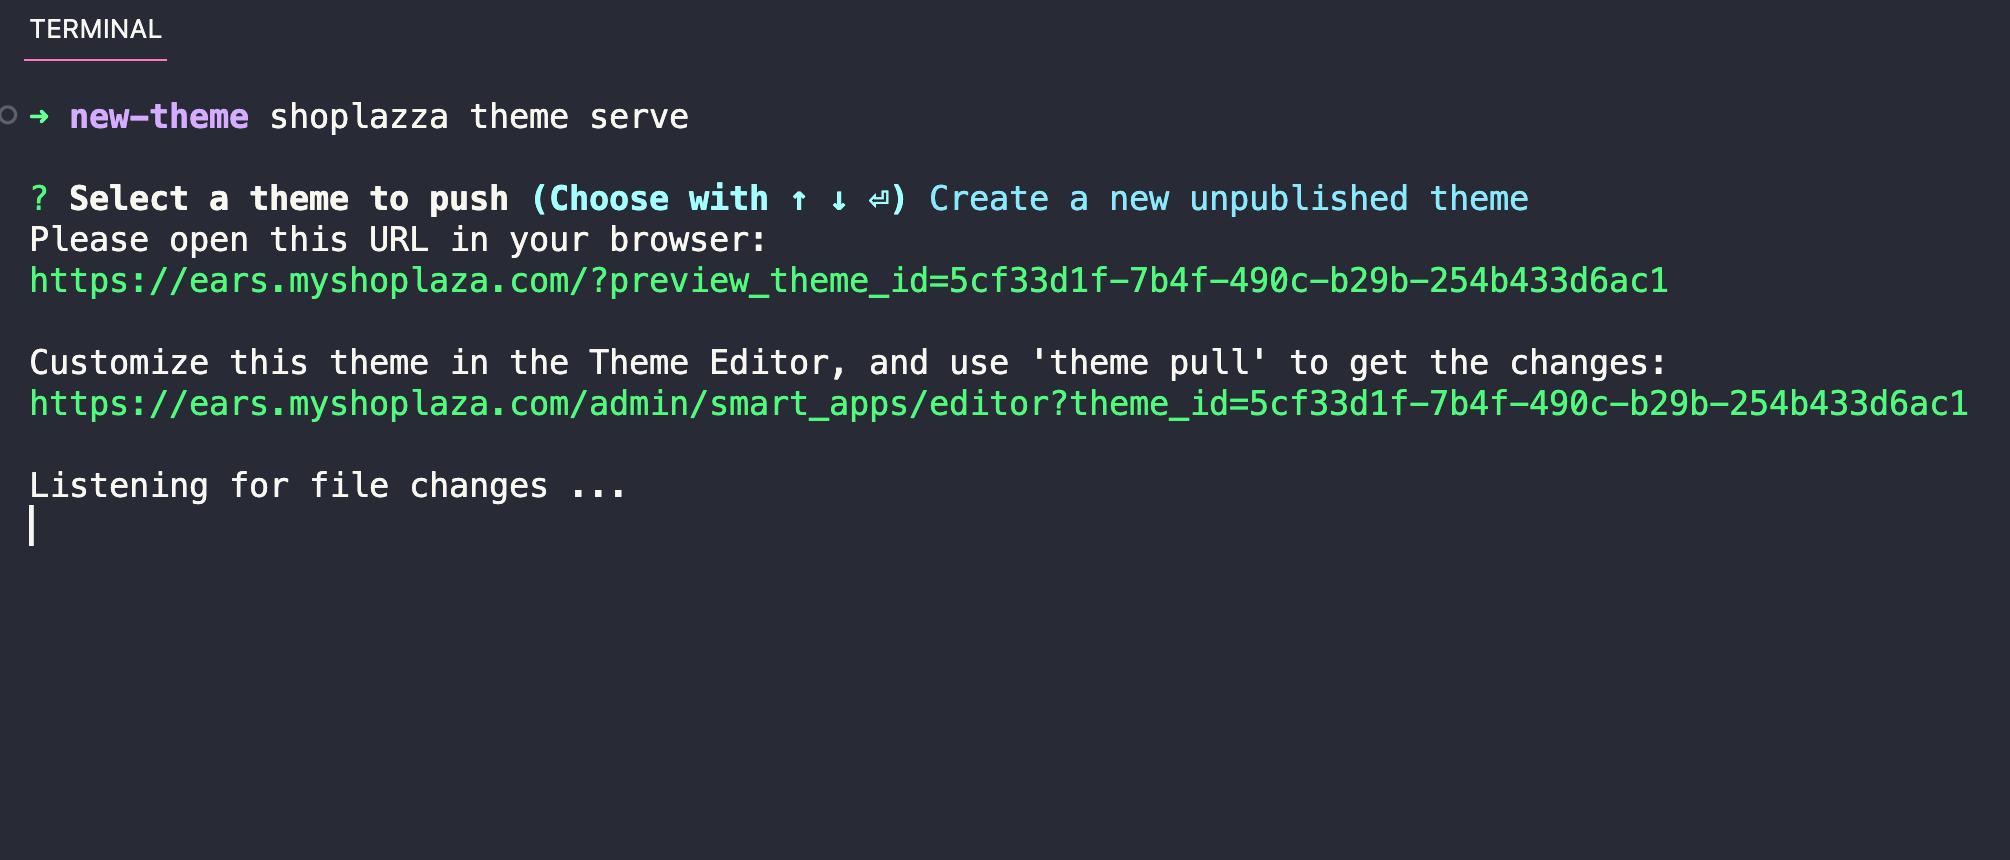
NoteYou can also use the
serveto generate a preview link and a link to the theme editor for the development theme.
Step 5: Upload your theme to a store
If you want to share a permanent link to your theme, update the code of an existing theme, or prepare for your theme to be published, then you need to push your theme code to Shoplazza using the theme push command.
The first time you push your theme code, you might want to upload the theme to your theme library as a new, unpublished theme. You can run the command and select Create a new unpublished theme.
shoplazza theme pushStep 6: Publish your theme
If you want to make your theme live on your store, then you can publish it using the theme publish command. Before you run this command, make sure that you've pushed all of your local changes to Shoplazza using the theme push command.
- Enter the following command:
shoplazza theme publish- Select the theme that you want to publish from the list.
- Select
Yesto confirm that you want to publish the specified theme.
The theme is published and is now the active theme for the store.
Next steps
Creating your first theme with our tools is only the first step in building your theme. Consider the following next steps:
Learn more about Shoplazza themes
- Explore the architecture of a theme. Learn more about the structure of a theme, and the role of each file and folder, in our architecture documentation.
Implement features
You can enable certain Shoplazza features or add functionality to your theme. Features fall into the following categories:
Updated 6 months ago
Here is a more comprehensive guide for theme creation