Test app
Testing an app has three steps — complete them in order:
- Create a development store (Step 1) — a sandbox store for installing apps that aren't public yet. Do this once.
- Install the app (Step 2) — the exact steps depend on how far along your backend is.
- Verify the app works (Step 3) — check core functionality and any extensions.
Which scenario are you in?
| Scenario | Use it when |
|---|---|
| Scenario 1: Test the installation flow only | You just scaffolded the project with the CLI — no business UI, backend, or OAuth flow yet. |
| Scenario 2: Backend service runs locally | You finished Develop a standalone app or Develop an embedded app (with billing configured, if applicable), and the backend runs on your machine. |
| Scenario 3: Backend service runs on a remote server | Your backend is developed separately, deployed with a public domain, and its OAuth callback routes are already implemented. |
Step 1: Create a development store
An app under development can't be listed in the App Store, so merchants can't install it. To test it, install it to a development store — a sandbox store type provided for partners.
Two things to know:
- A development store can install and test the apps under the same partner account.
- Each partner account can have up to 10 development stores, and they cannot be transferred.
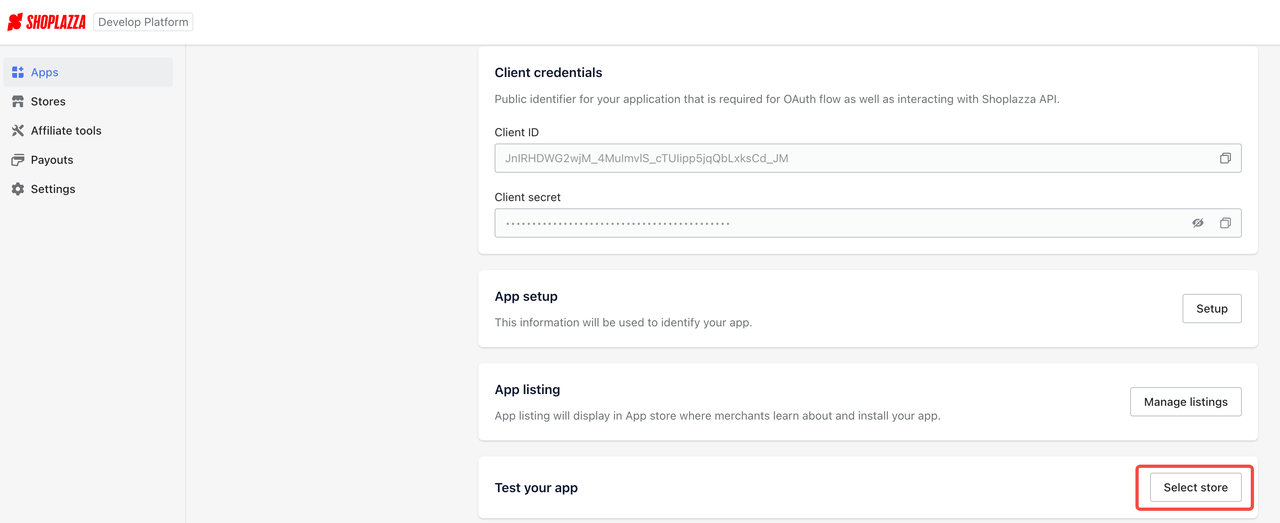
- In Shoplazza Partners, click "select store"
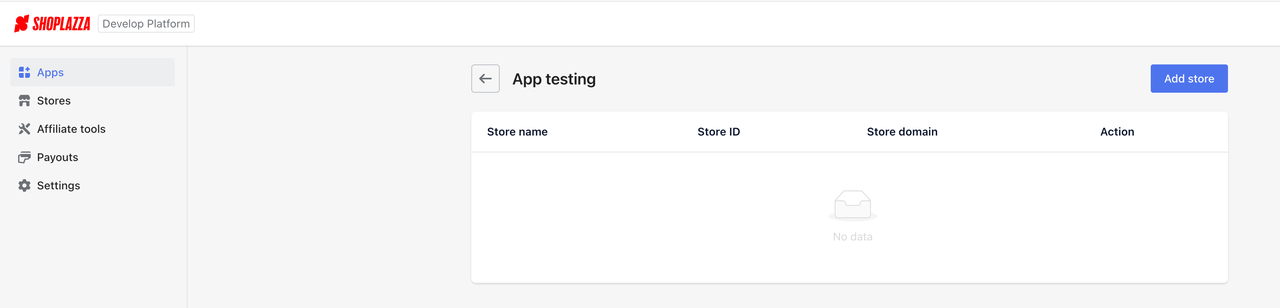
- Click "Add store"
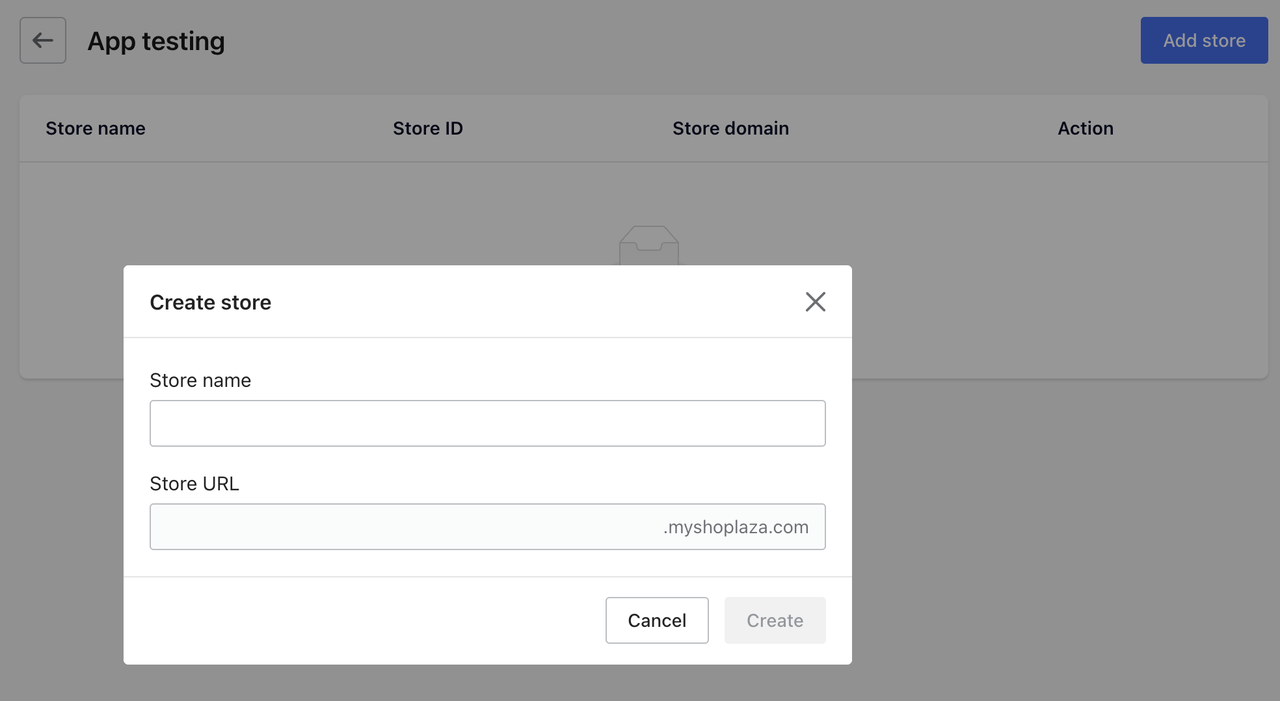
- Enter "store name" and "Store URL", then click "Create"
Step 2: Install the app
Scenario 1: Test the installation flow only
There's no backend yet, so the app can't complete installation on its own — the built-in service of shoplazza app dev temporarily acts as the authorization service:
-
Run
shoplazza app devin the project root and keep it running -
Fill the printed App URL and Redirect URL into your app's settings in Partners
-
Open the Install URL in your browser and complete the authorization
An app shell installed this way has no actual functionality. To release the app to merchants, complete it following Develop a standalone app.
Scenario 2: Backend service runs locally
Shoplazza must reach your locally-running service through a public URL to complete the installation — that's what ngrok is for.
-
Run
shoplazza app devin the project root — it pushes the project's extension code (theme / checkout / function) to your own test store. Skip this step if your app has no extensions yet. -
Start your service — the app service and the ngrok tunnel, in two terminals:
bash# Start the app servicenpm run startbash# Start ngrok, mapping local port 3000 to a public addressngrok http 3000ngrok prints a public address like
https://xxx.ngrok-free.dev -
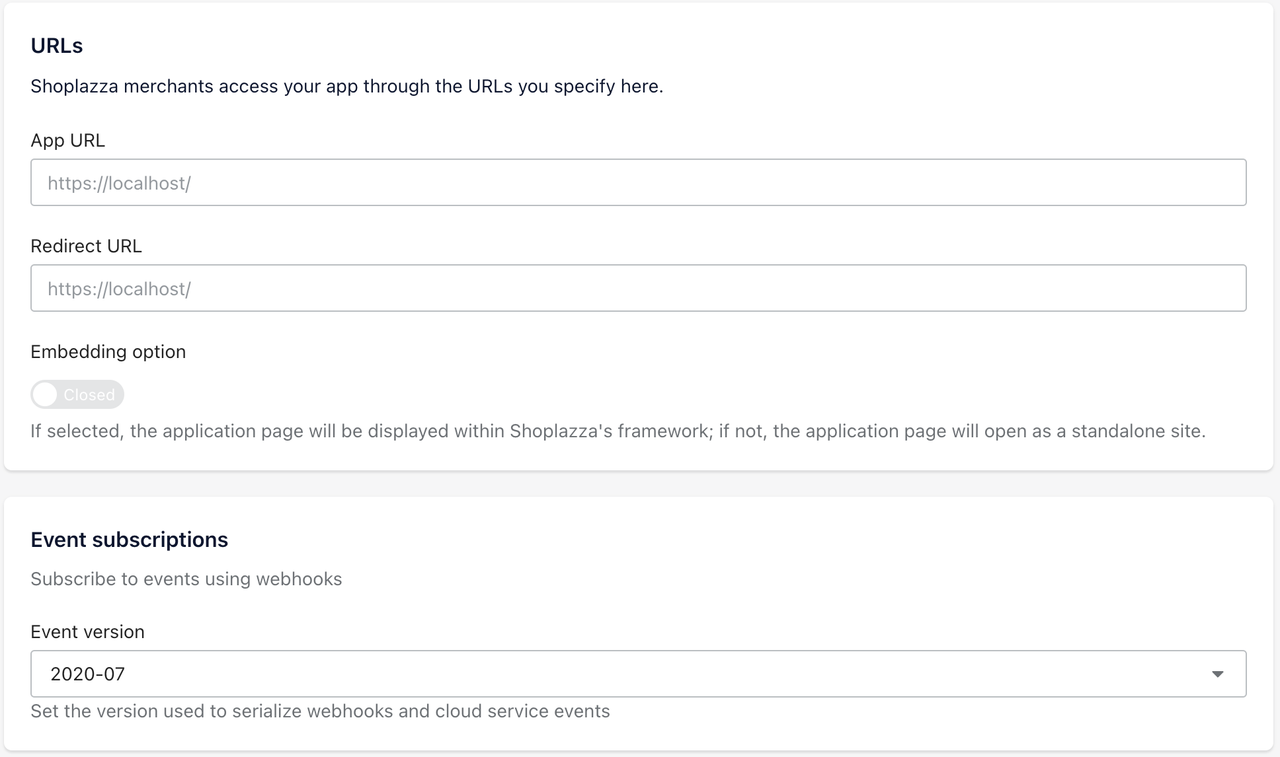
In Partners, fill the address into your app's settings:
- Set
App URLtohttps://xxx.ngrok-free.dev/auth - Set
Redirect URLtohttps://xxx.ngrok-free.dev/auth/callback
- Set
-
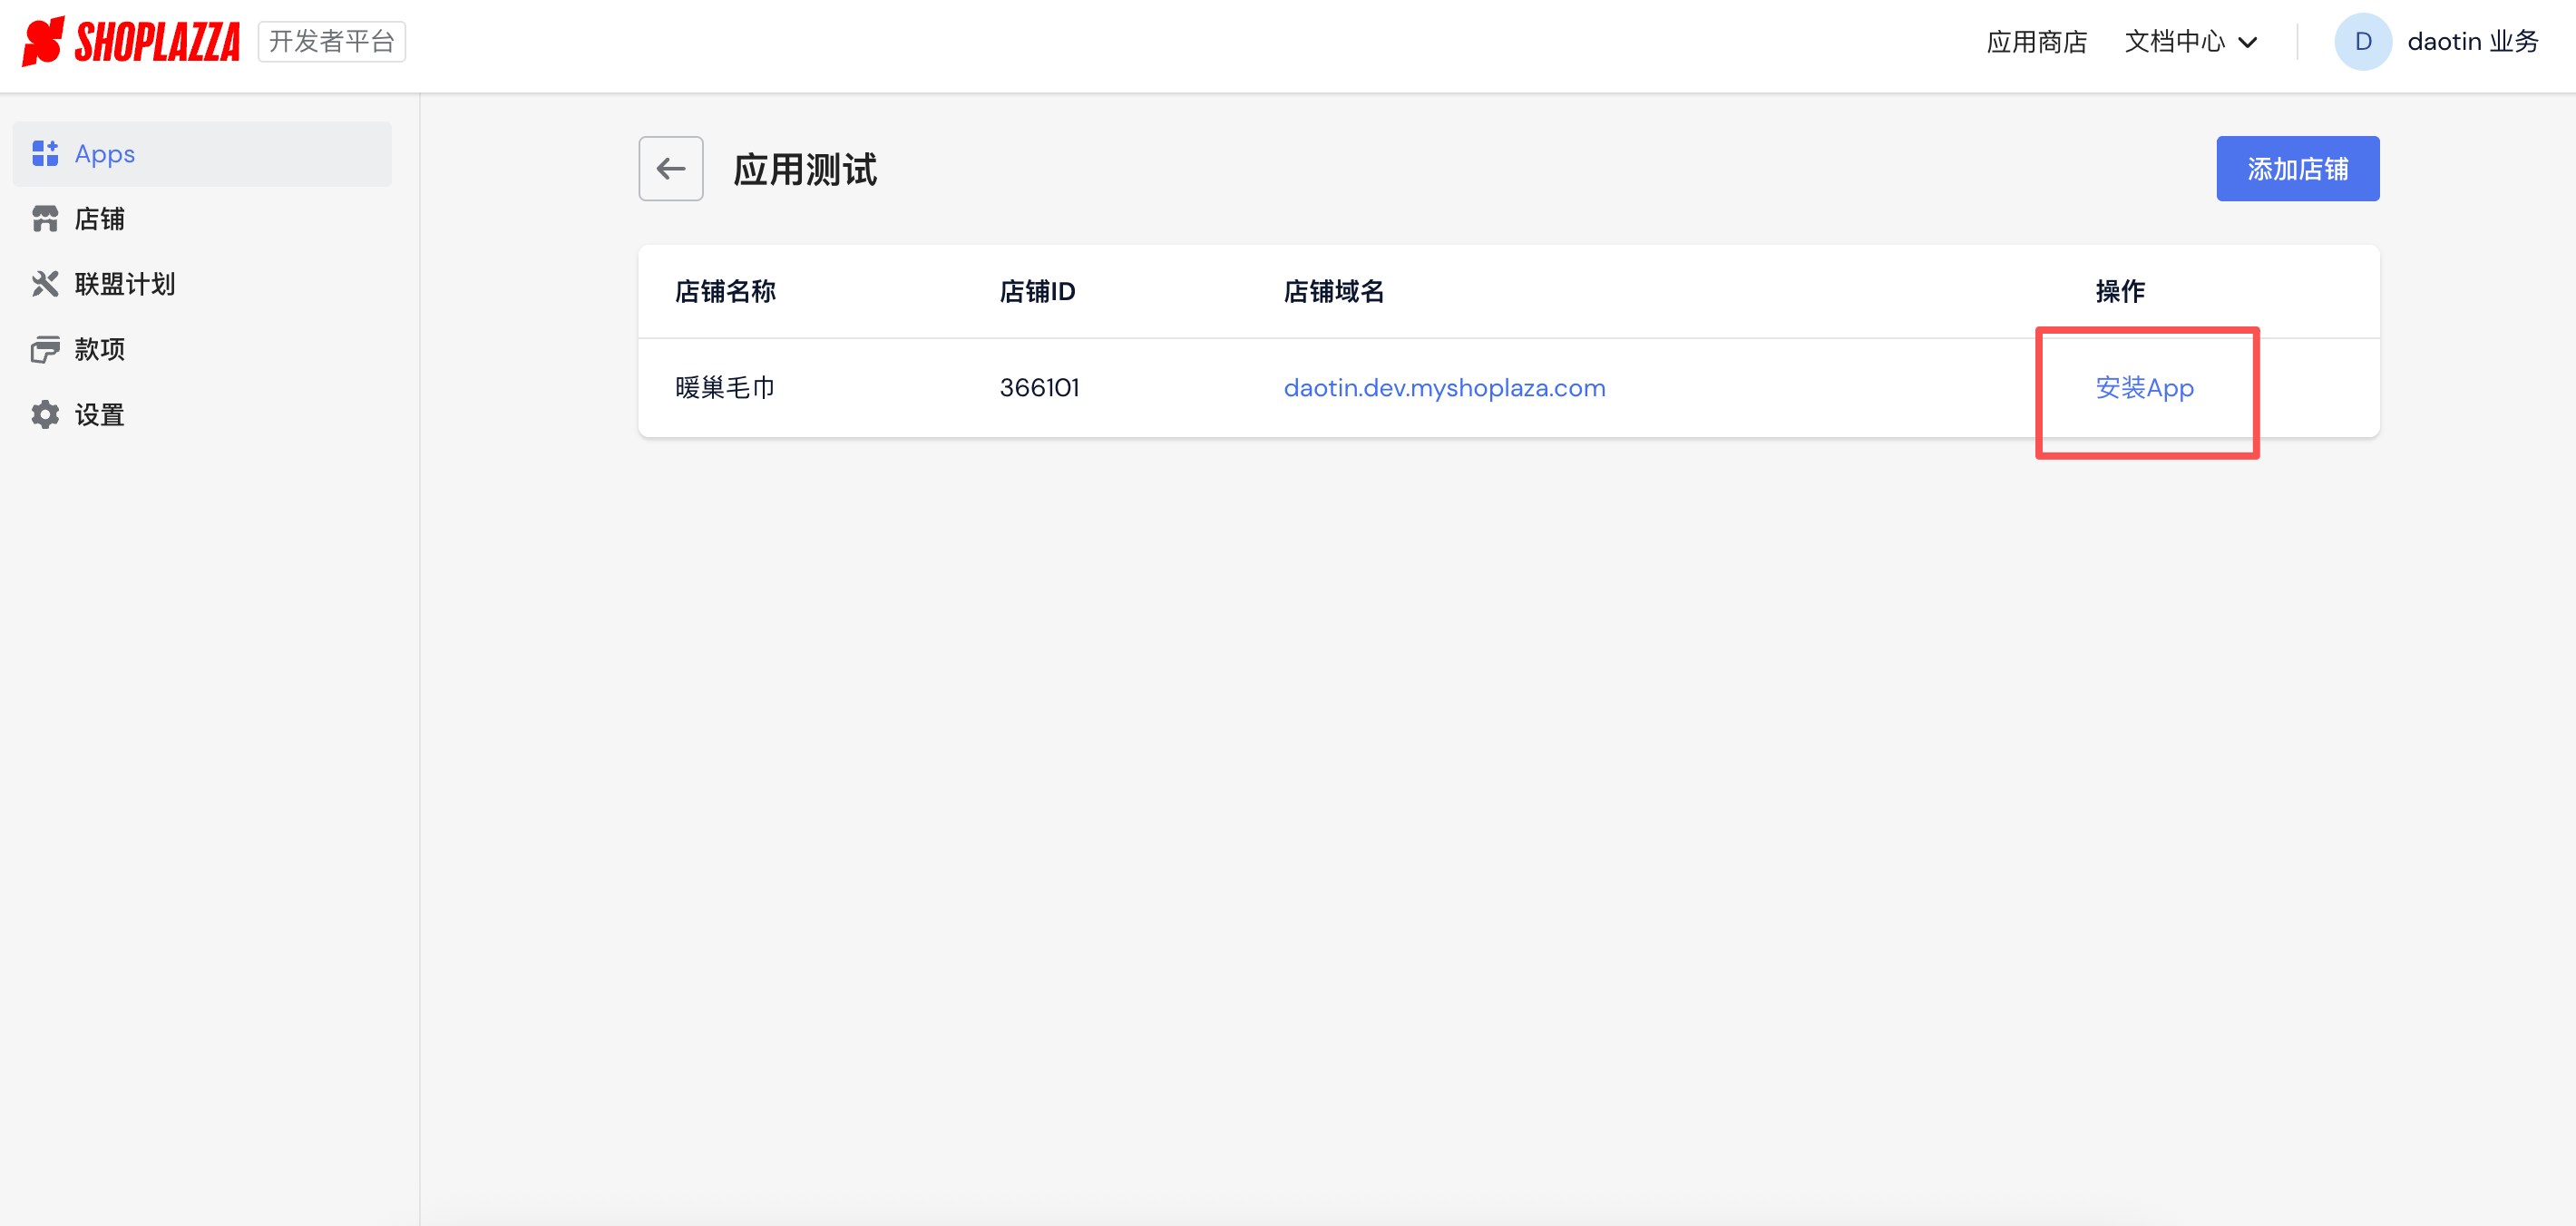
Click "App Detail Page → App Testing → Select Store → Install App"
-
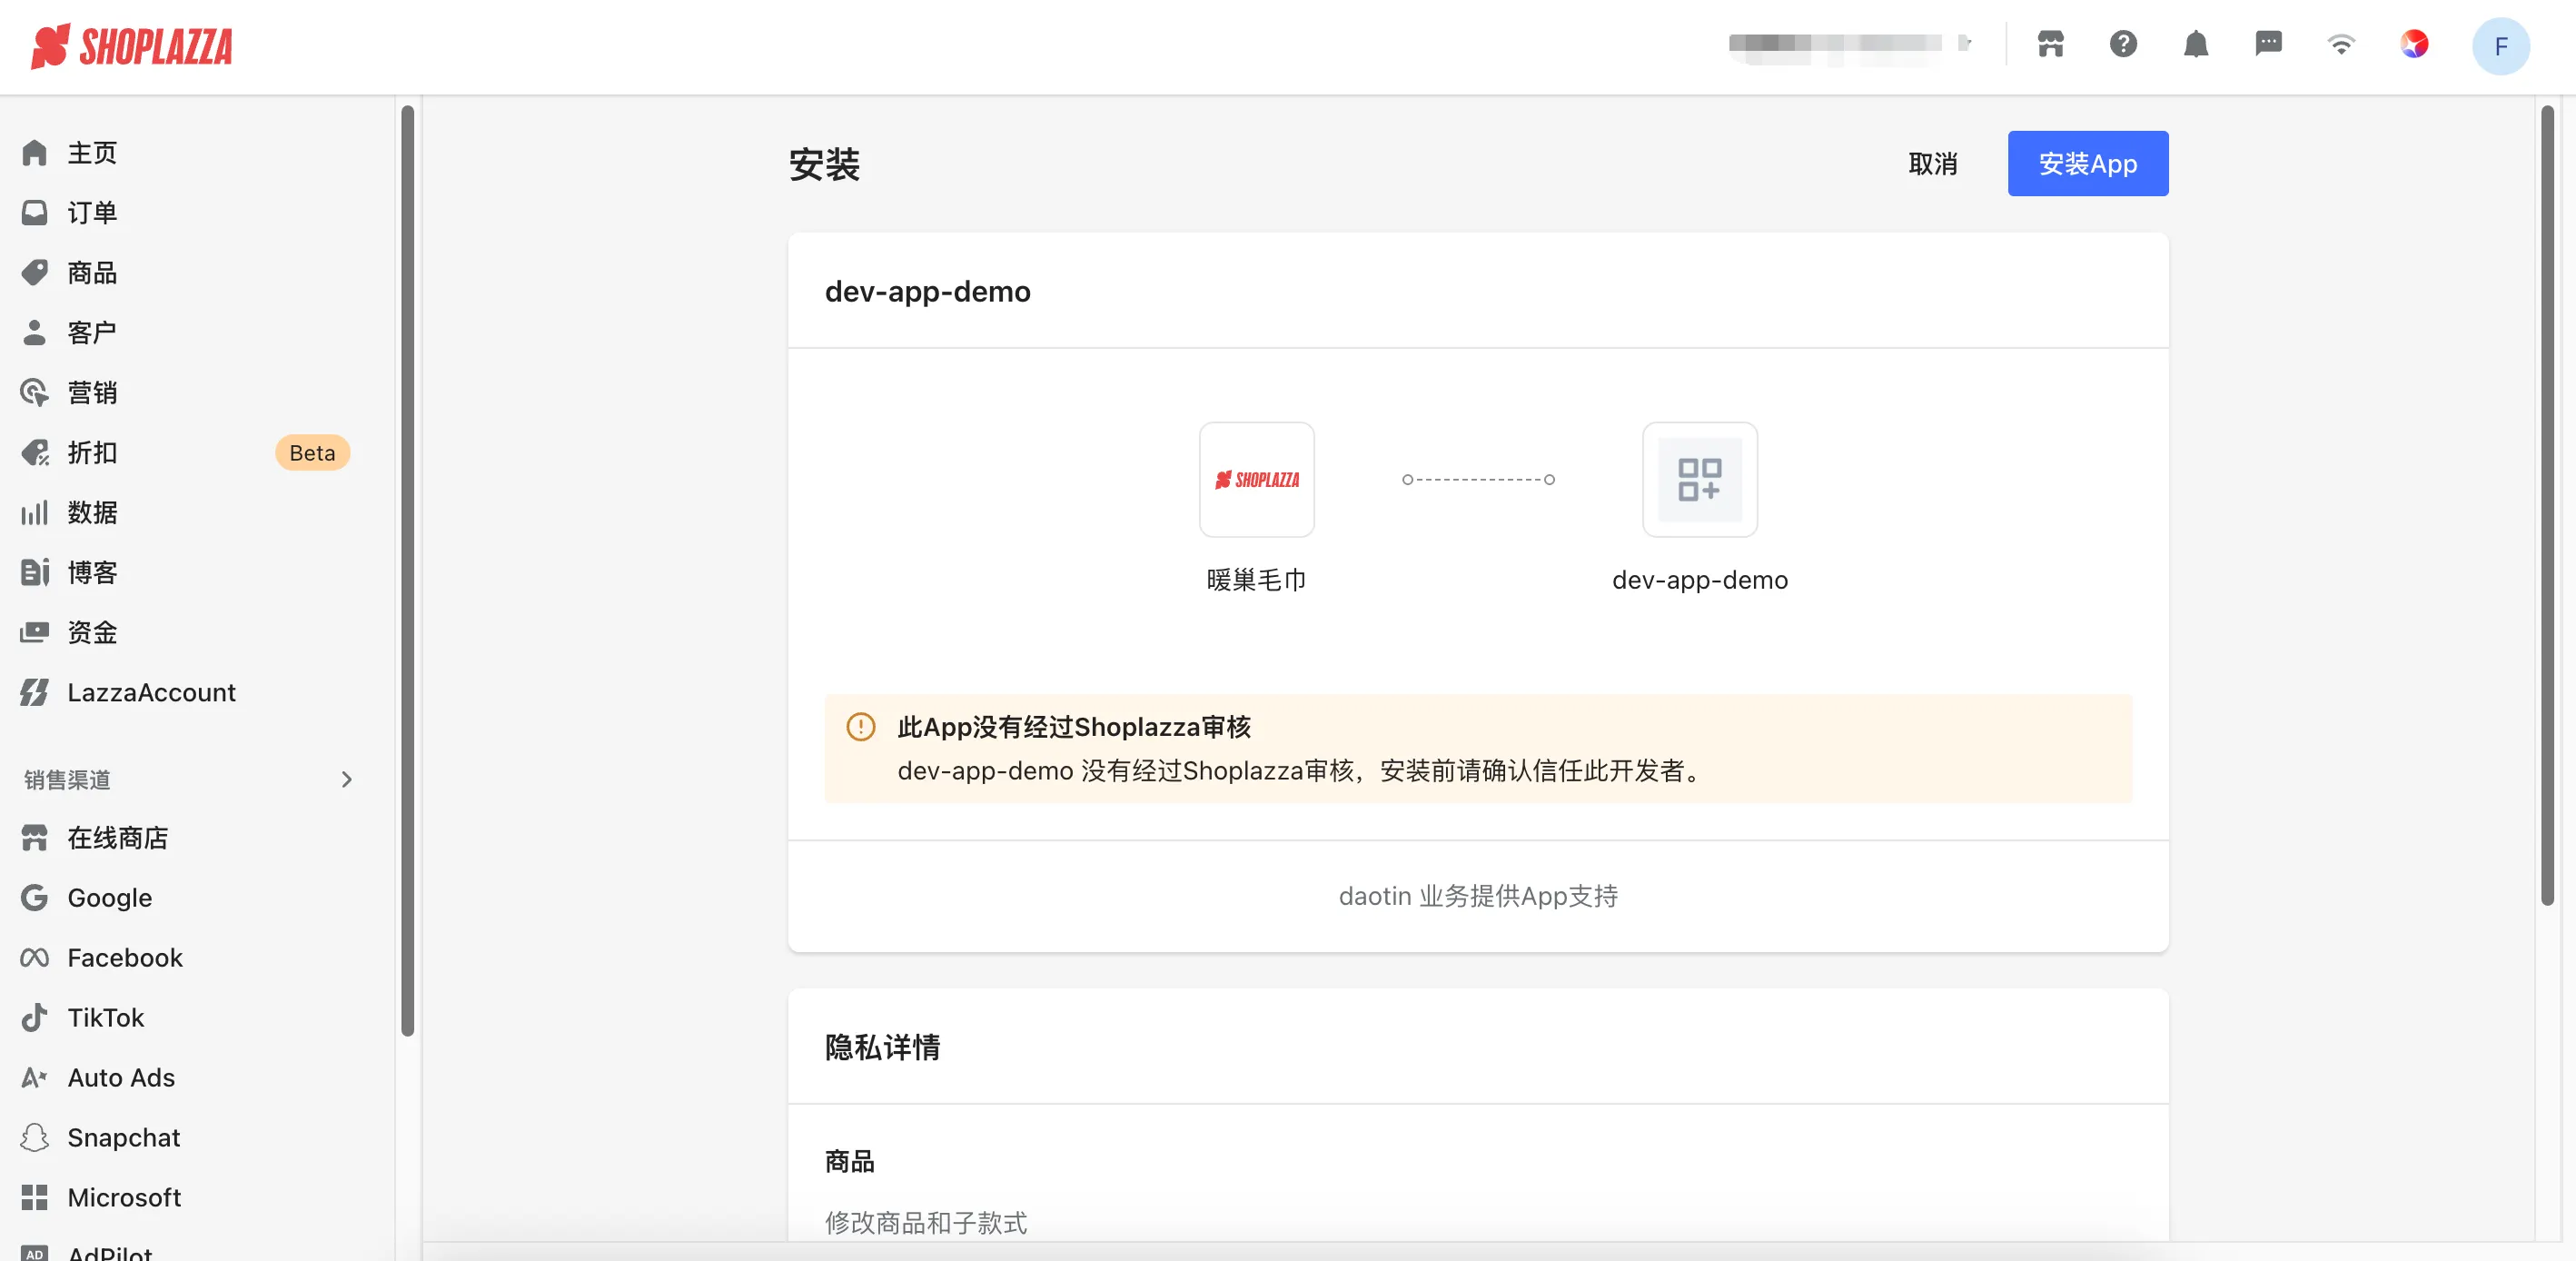
Once redirected to the Shoplazza authorization page, click "Install App"
-
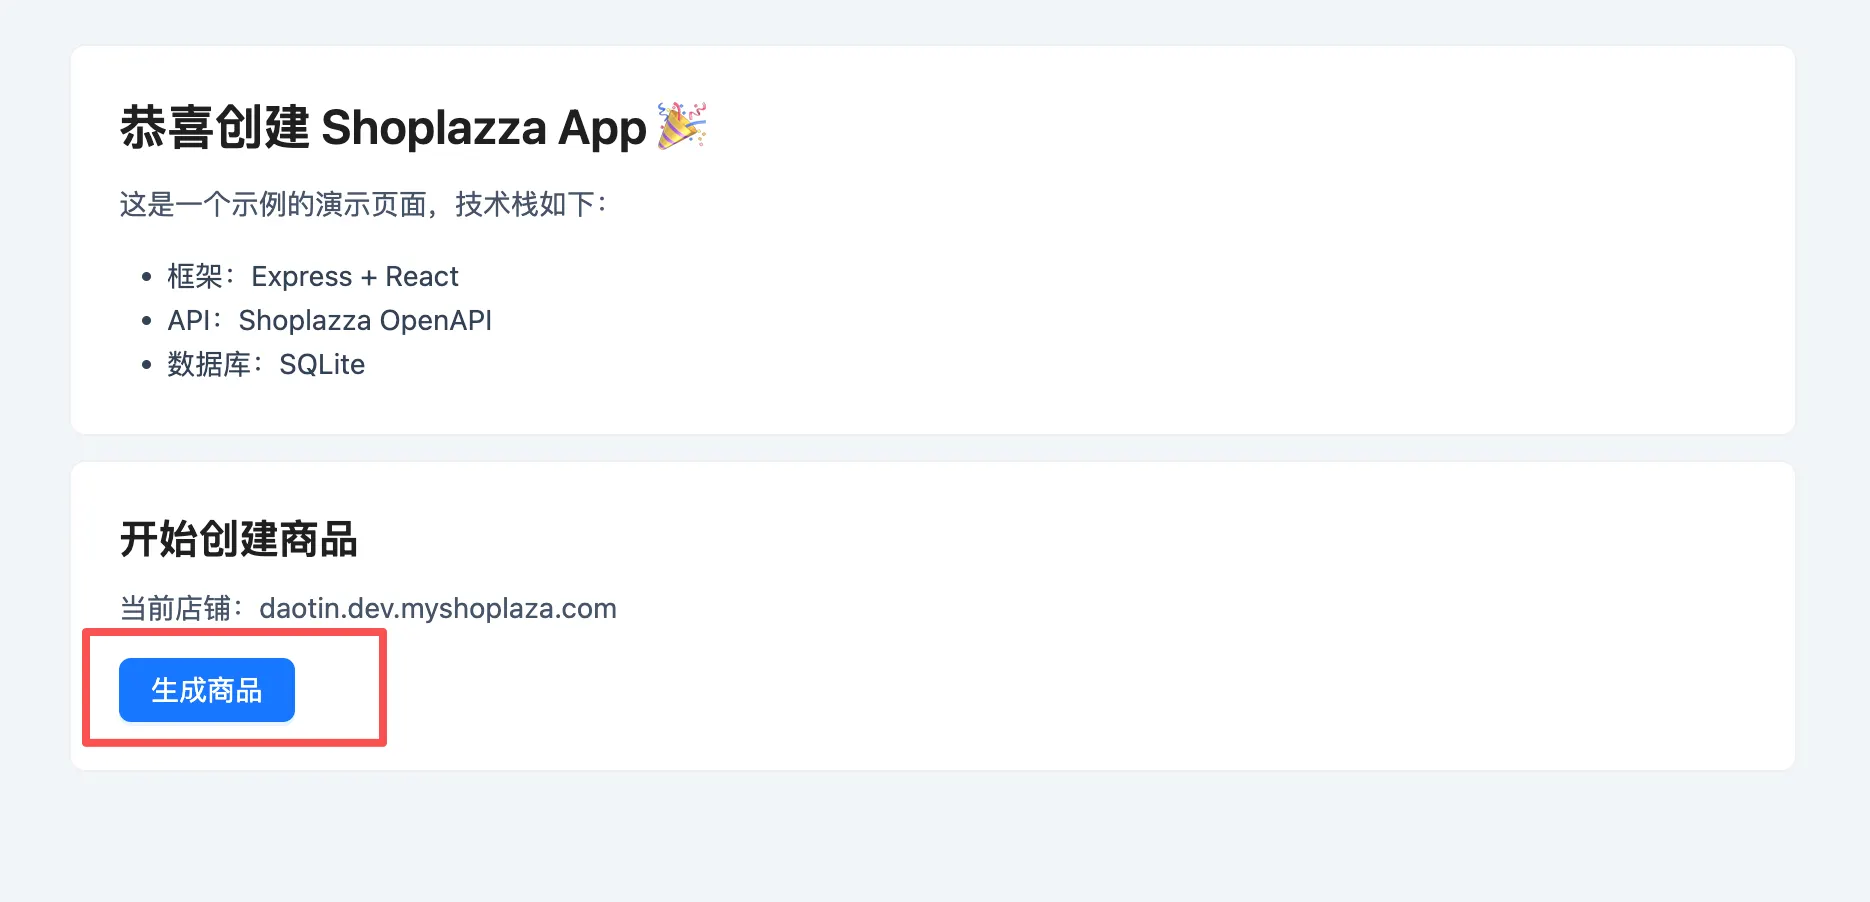
After successful authorization: a standalone app redirects you to the app's home page, while an embedded app opens as an iframe inside the store admin
Scenario 3: Backend service runs on a remote server
The local app project keeps only the business UI and extensions — OAuth authorization, token storage, and OpenAPI calls all live in the remote backend.
-
Run
shoplazza app devin the project root — it pushes the project's extension code (theme / checkout / function) to your own test store. Skip this step if you have no extensions in this project. -
Fill the remote service's address into your app's settings in Partners:
- Set
App URLtohttps://your-domain.com/auth - Set
Redirect URLtohttps://your-domain.com/auth/callback
Use the paths your remote service actually implements — they just need to match what you fill in here.
- Set
-
Click "App Detail Page → App Testing → Select Store → Install App"
-
Once redirected to the Shoplazza authorization page, click "Install App". The authorization itself is handled by your remote service.
-
After successful authorization: a standalone app redirects you to the app's home page, while an embedded app opens as an iframe inside the store admin
-
Debug business API calls by calling your remote backend's endpoints directly. The local app holds no Shoplazza token — business requests go to your remote backend, which calls the OpenAPI with its stored token and returns the result (see the App Authorization Reference for how the token is obtained and stored).
Step 3: Test app functionality
Verify that the app's core features work as expected. If you built the sample app from the Develop a standalone app tutorial, for example:
-
On the app's home page, click the "Generate Product" button
-
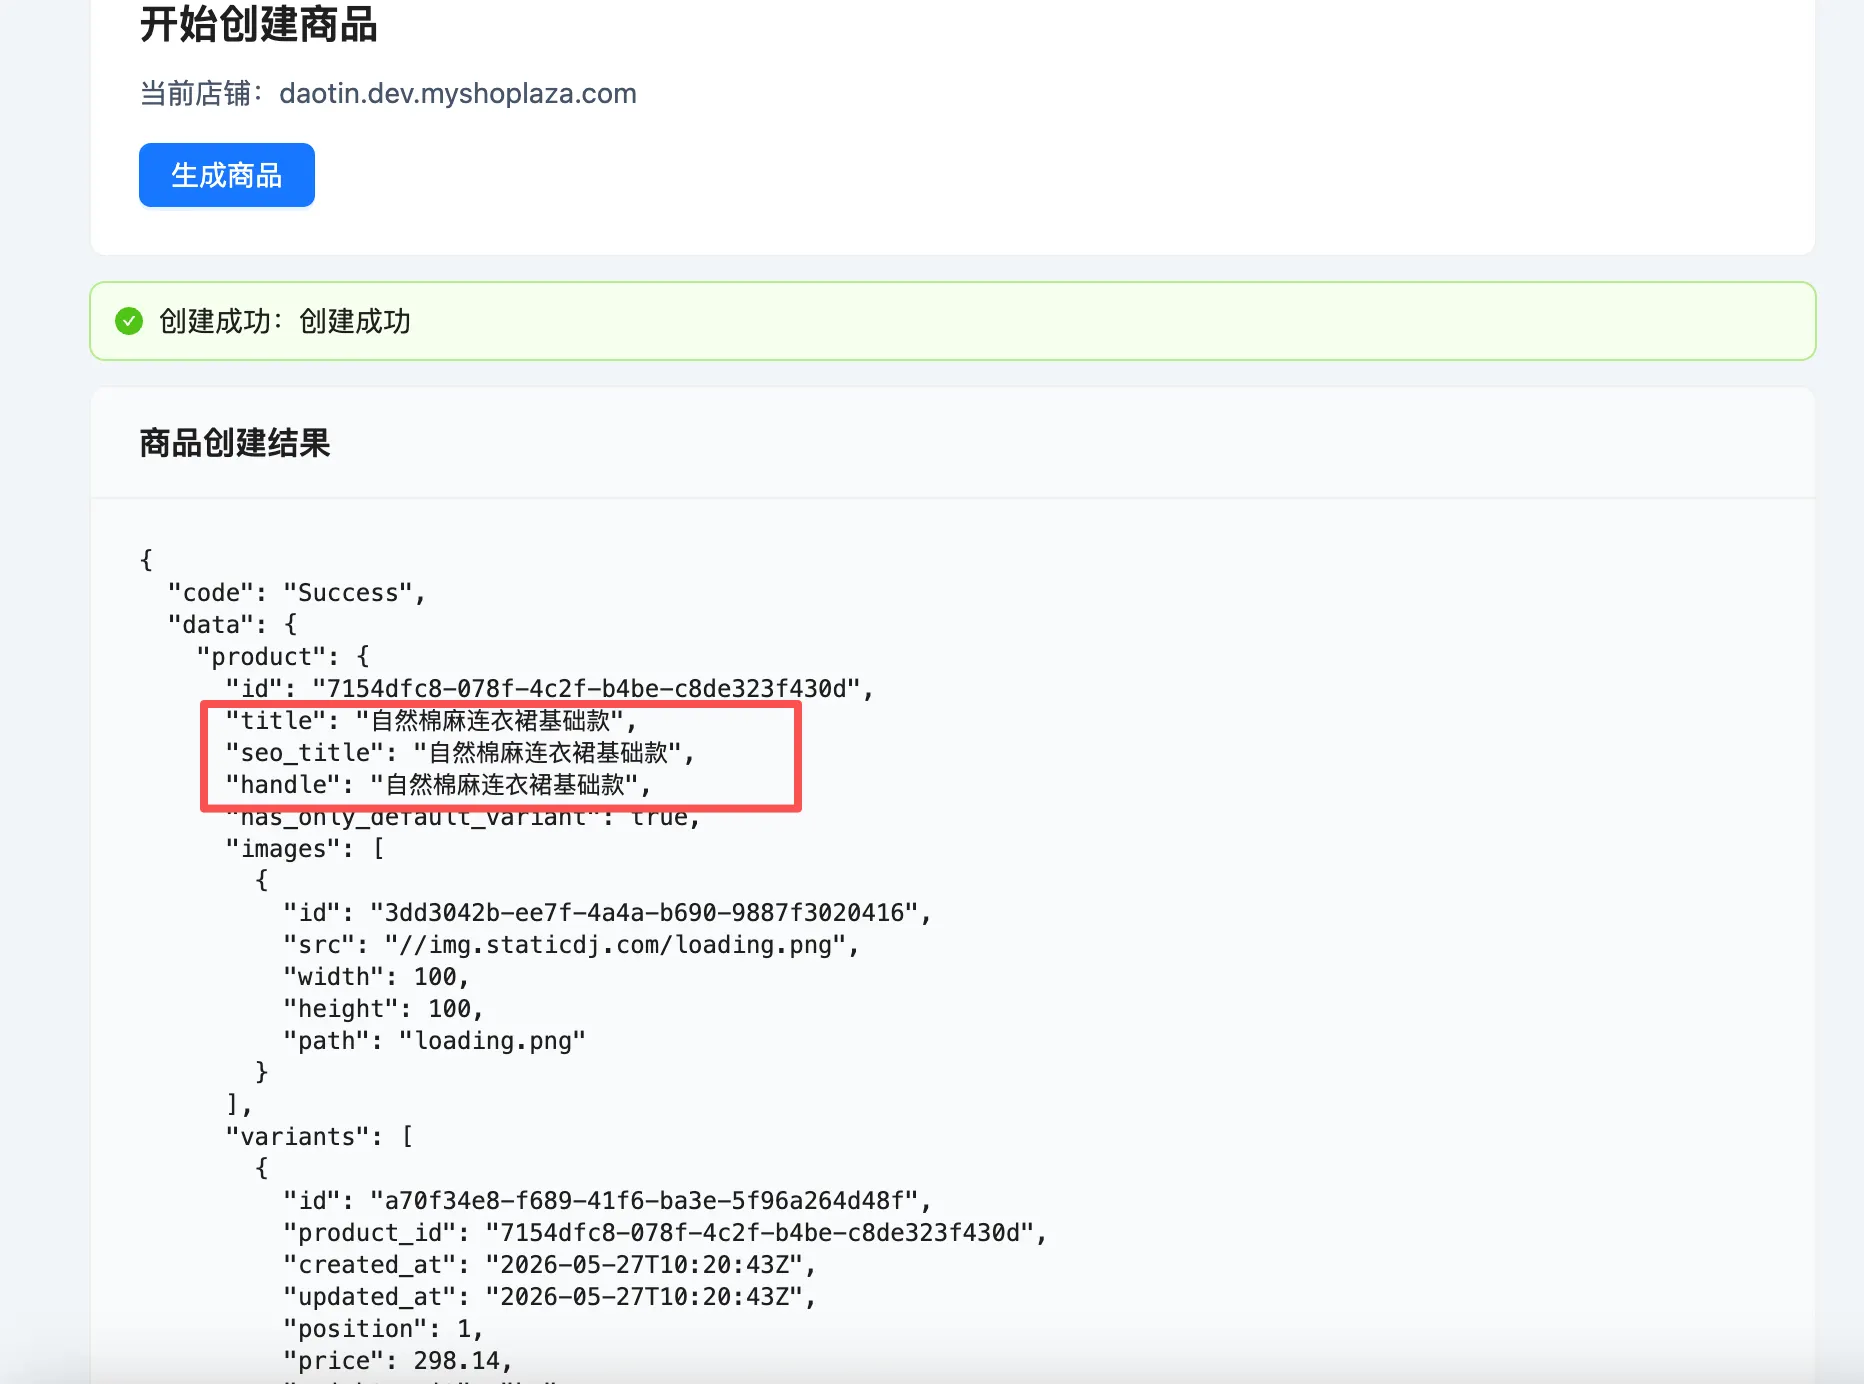
A few seconds later, you'll see a success message along with product details
-
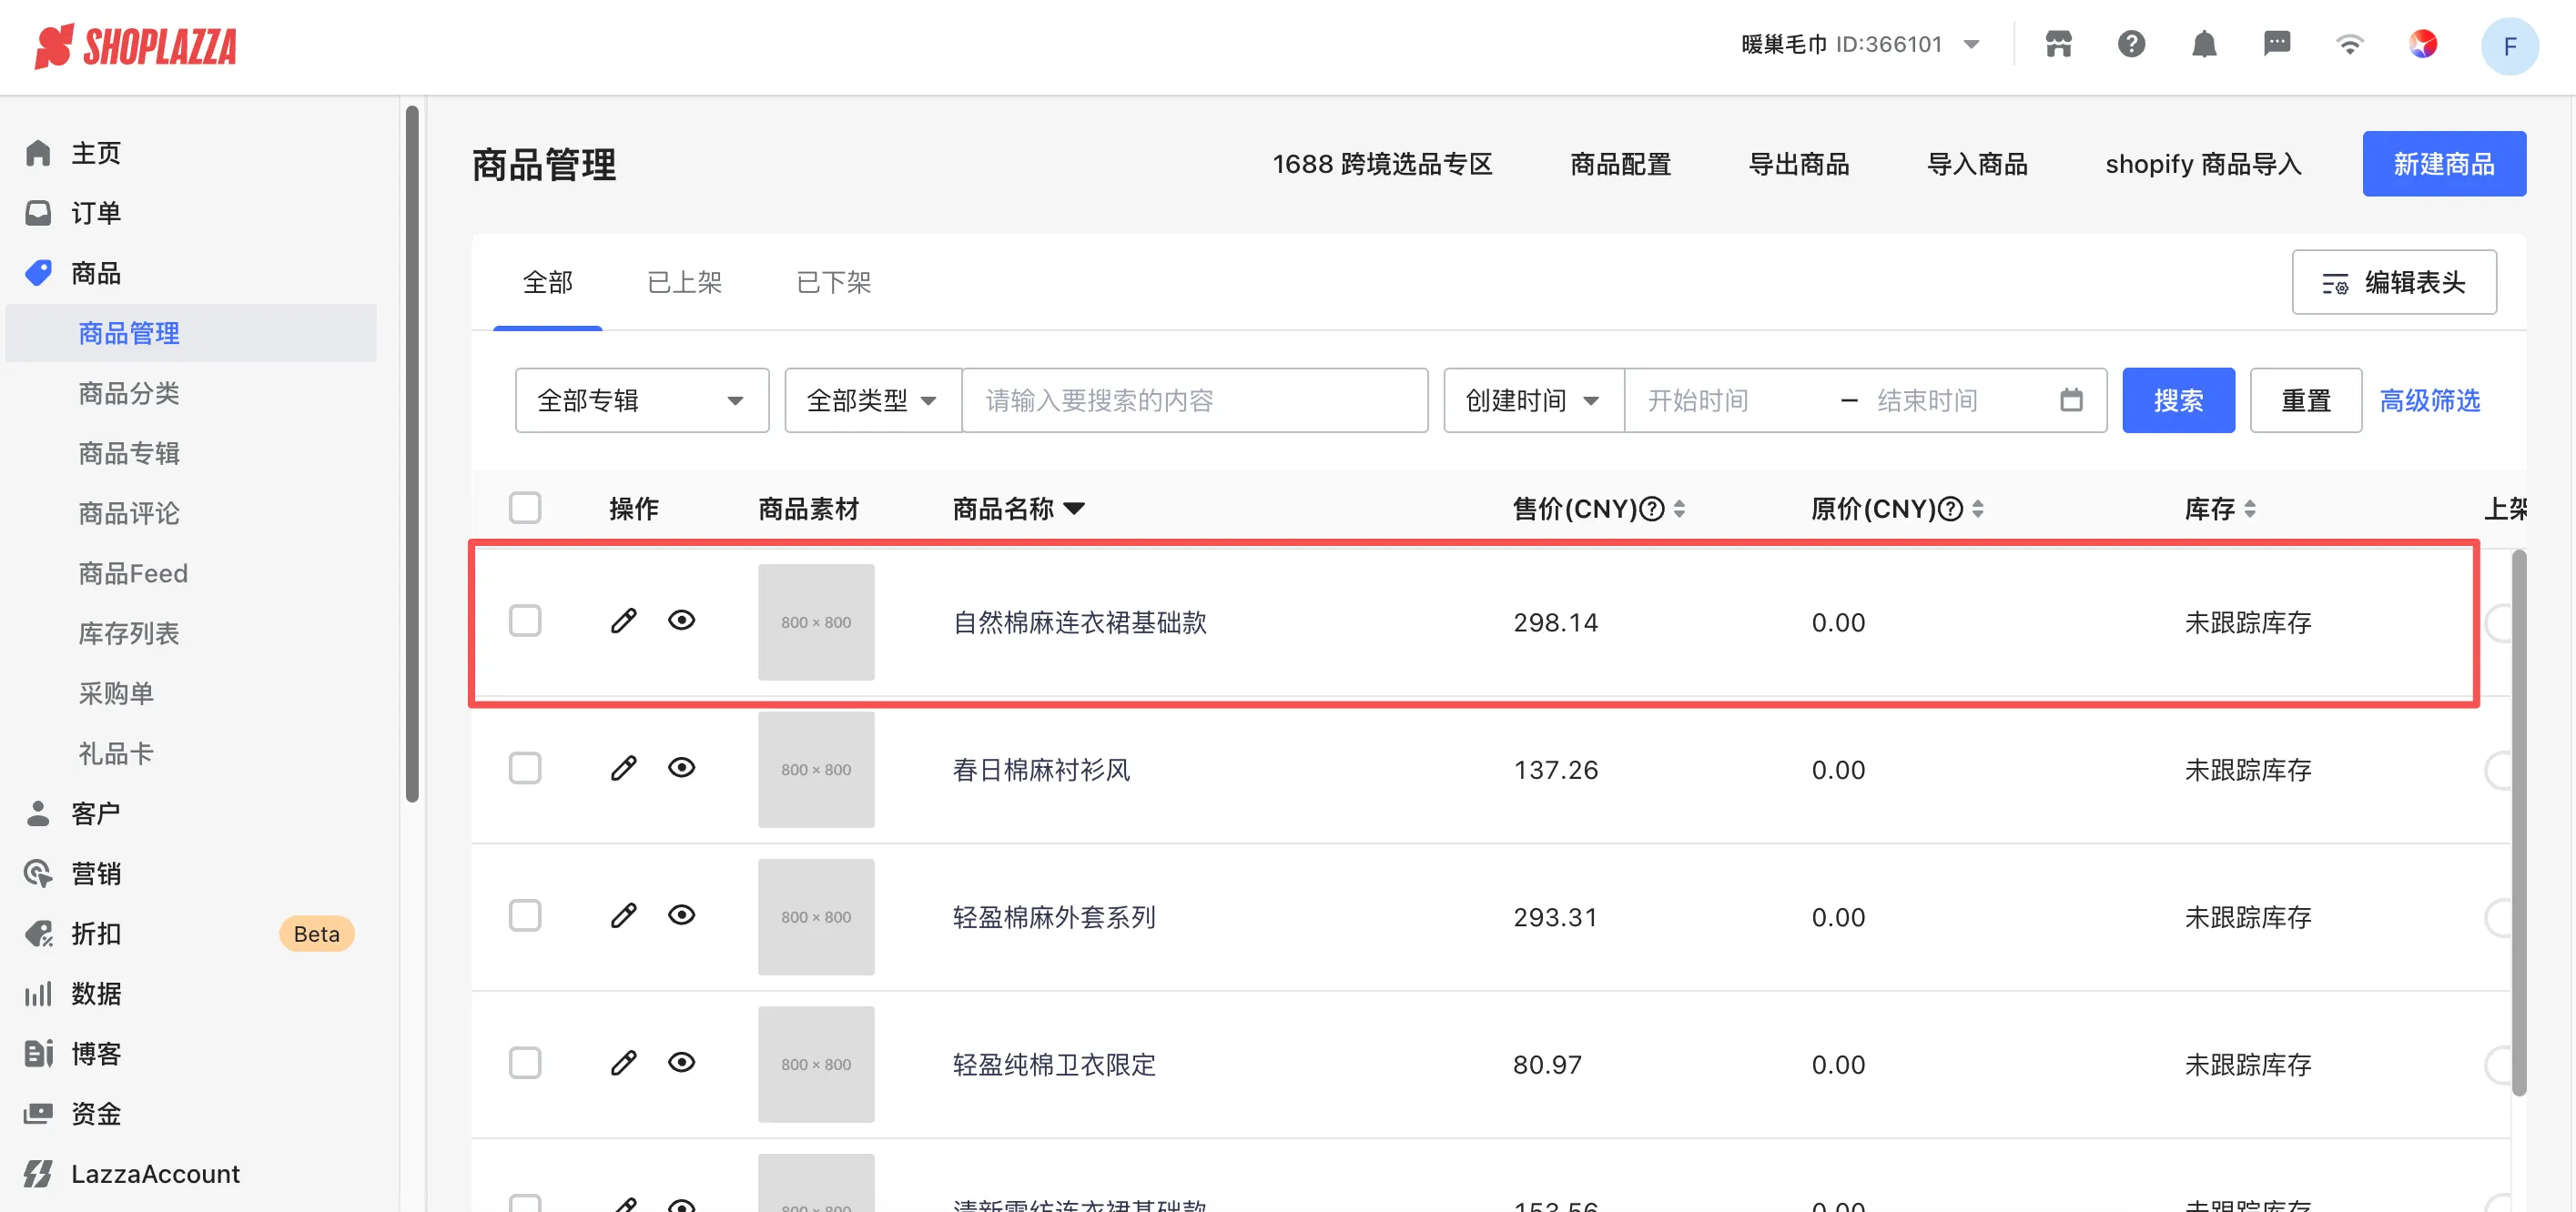
Log in to the Shoplazza store admin, go to the "Products" page to view the newly created product
If your app carries extensions, verify each extension type:
-
Theme extension: in the store admin, go to Online Store > Theme Editor.
-
Basic (App Block): add the block to a section that supports
@app, then check the rendering.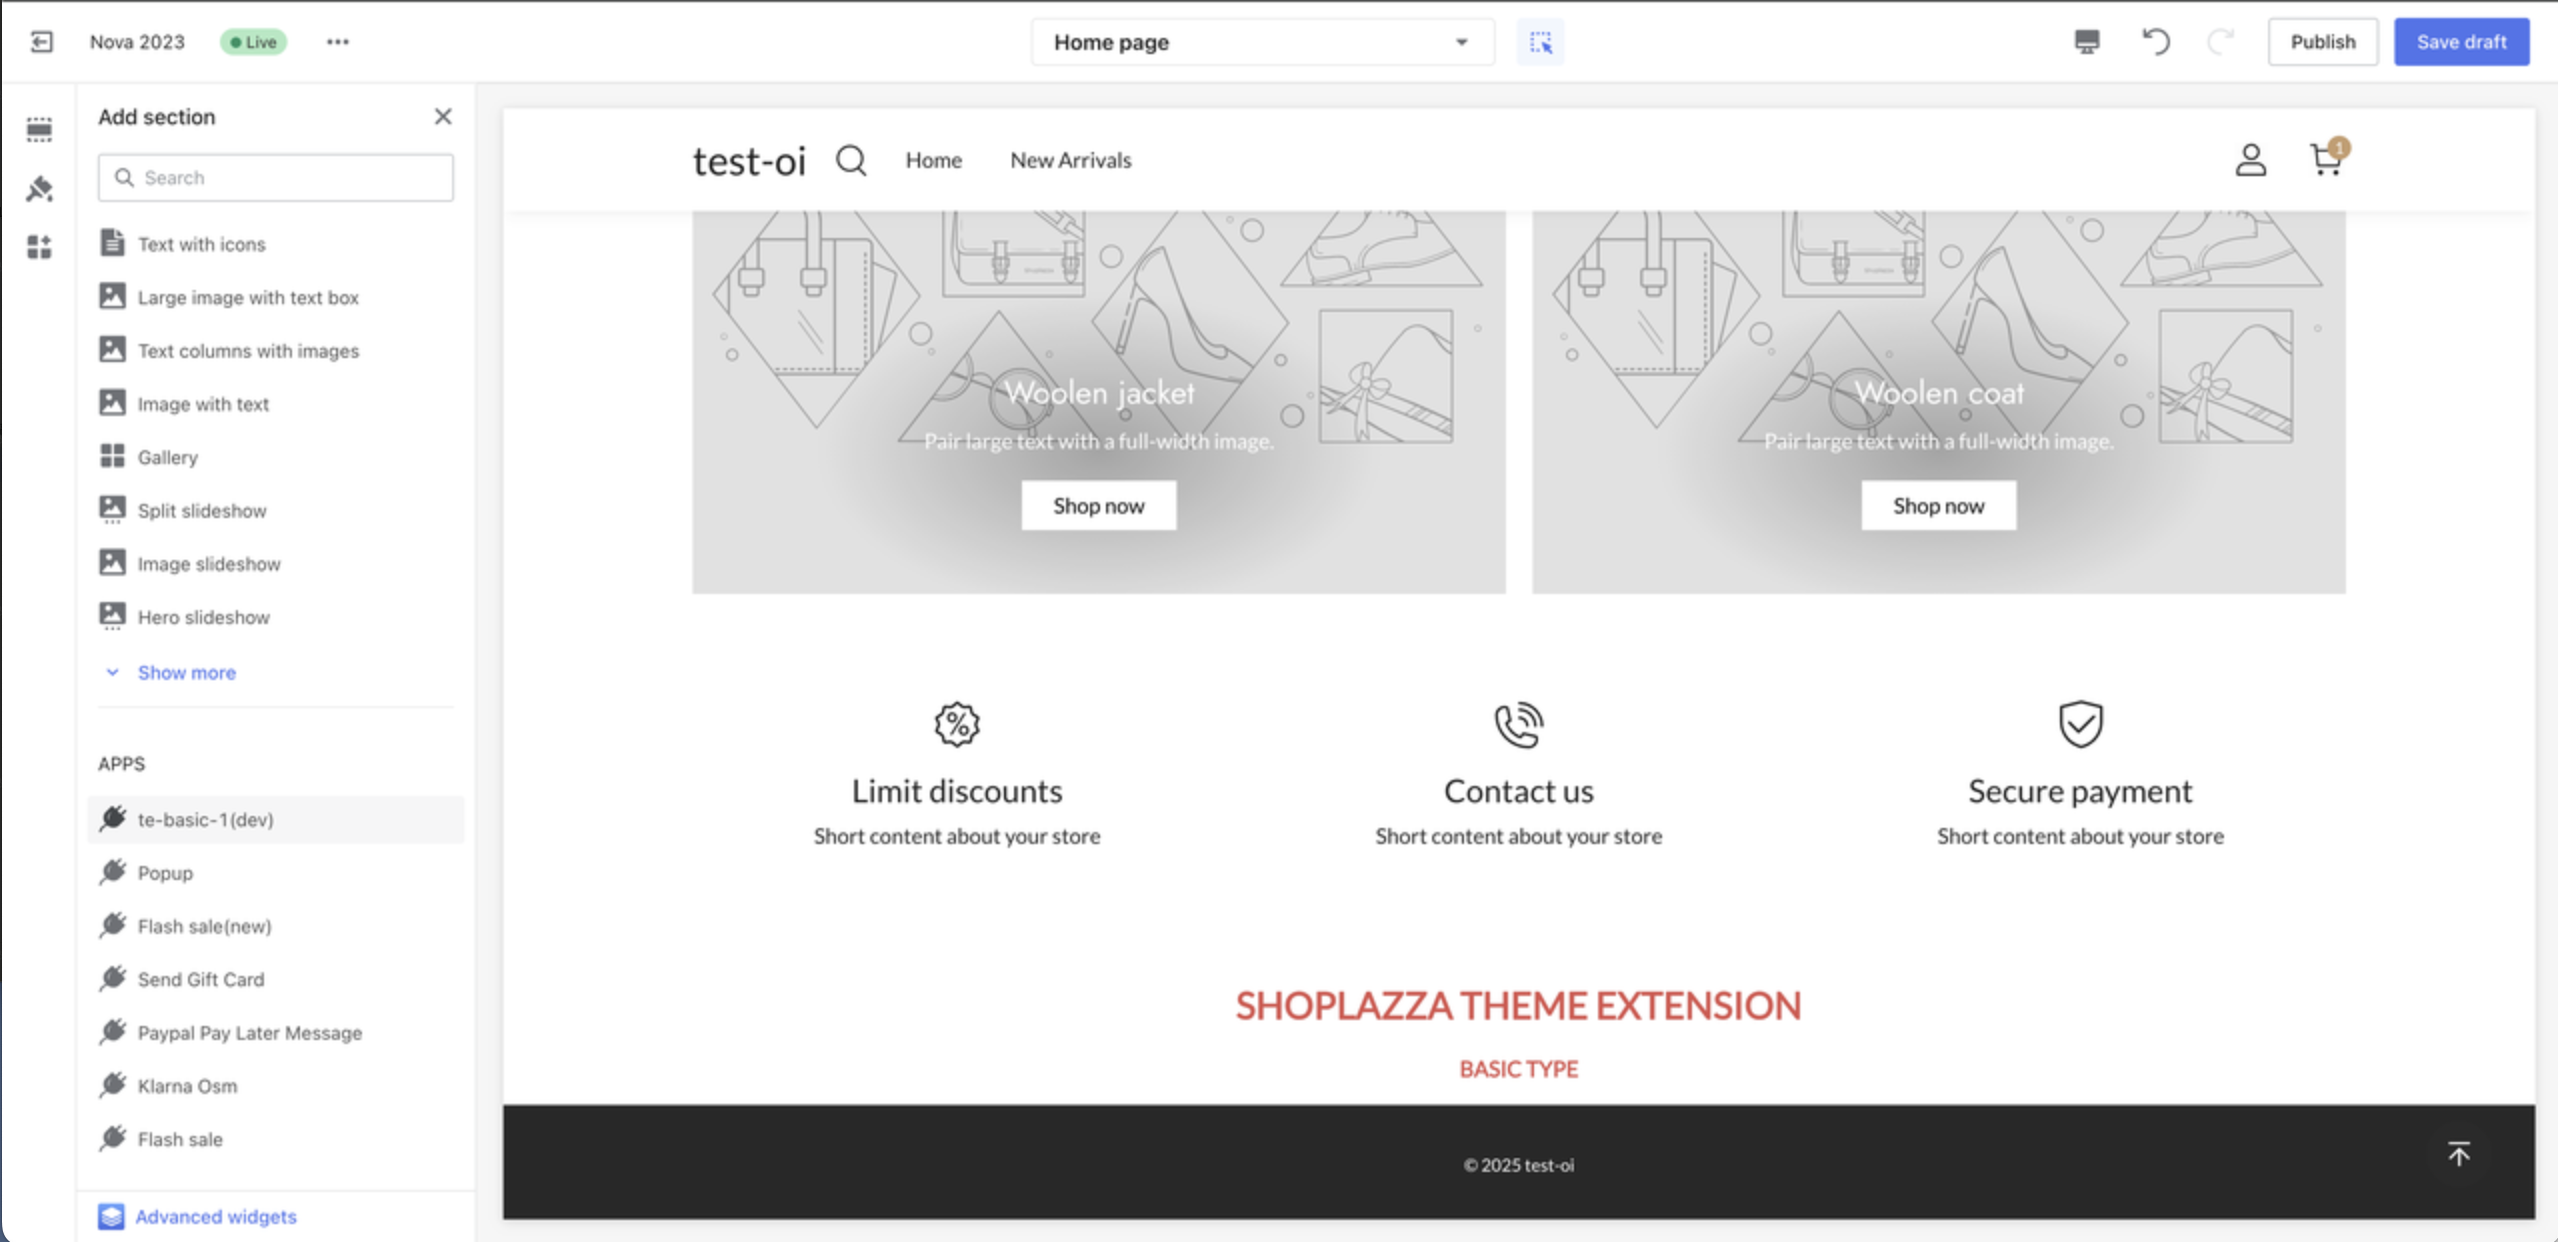
-
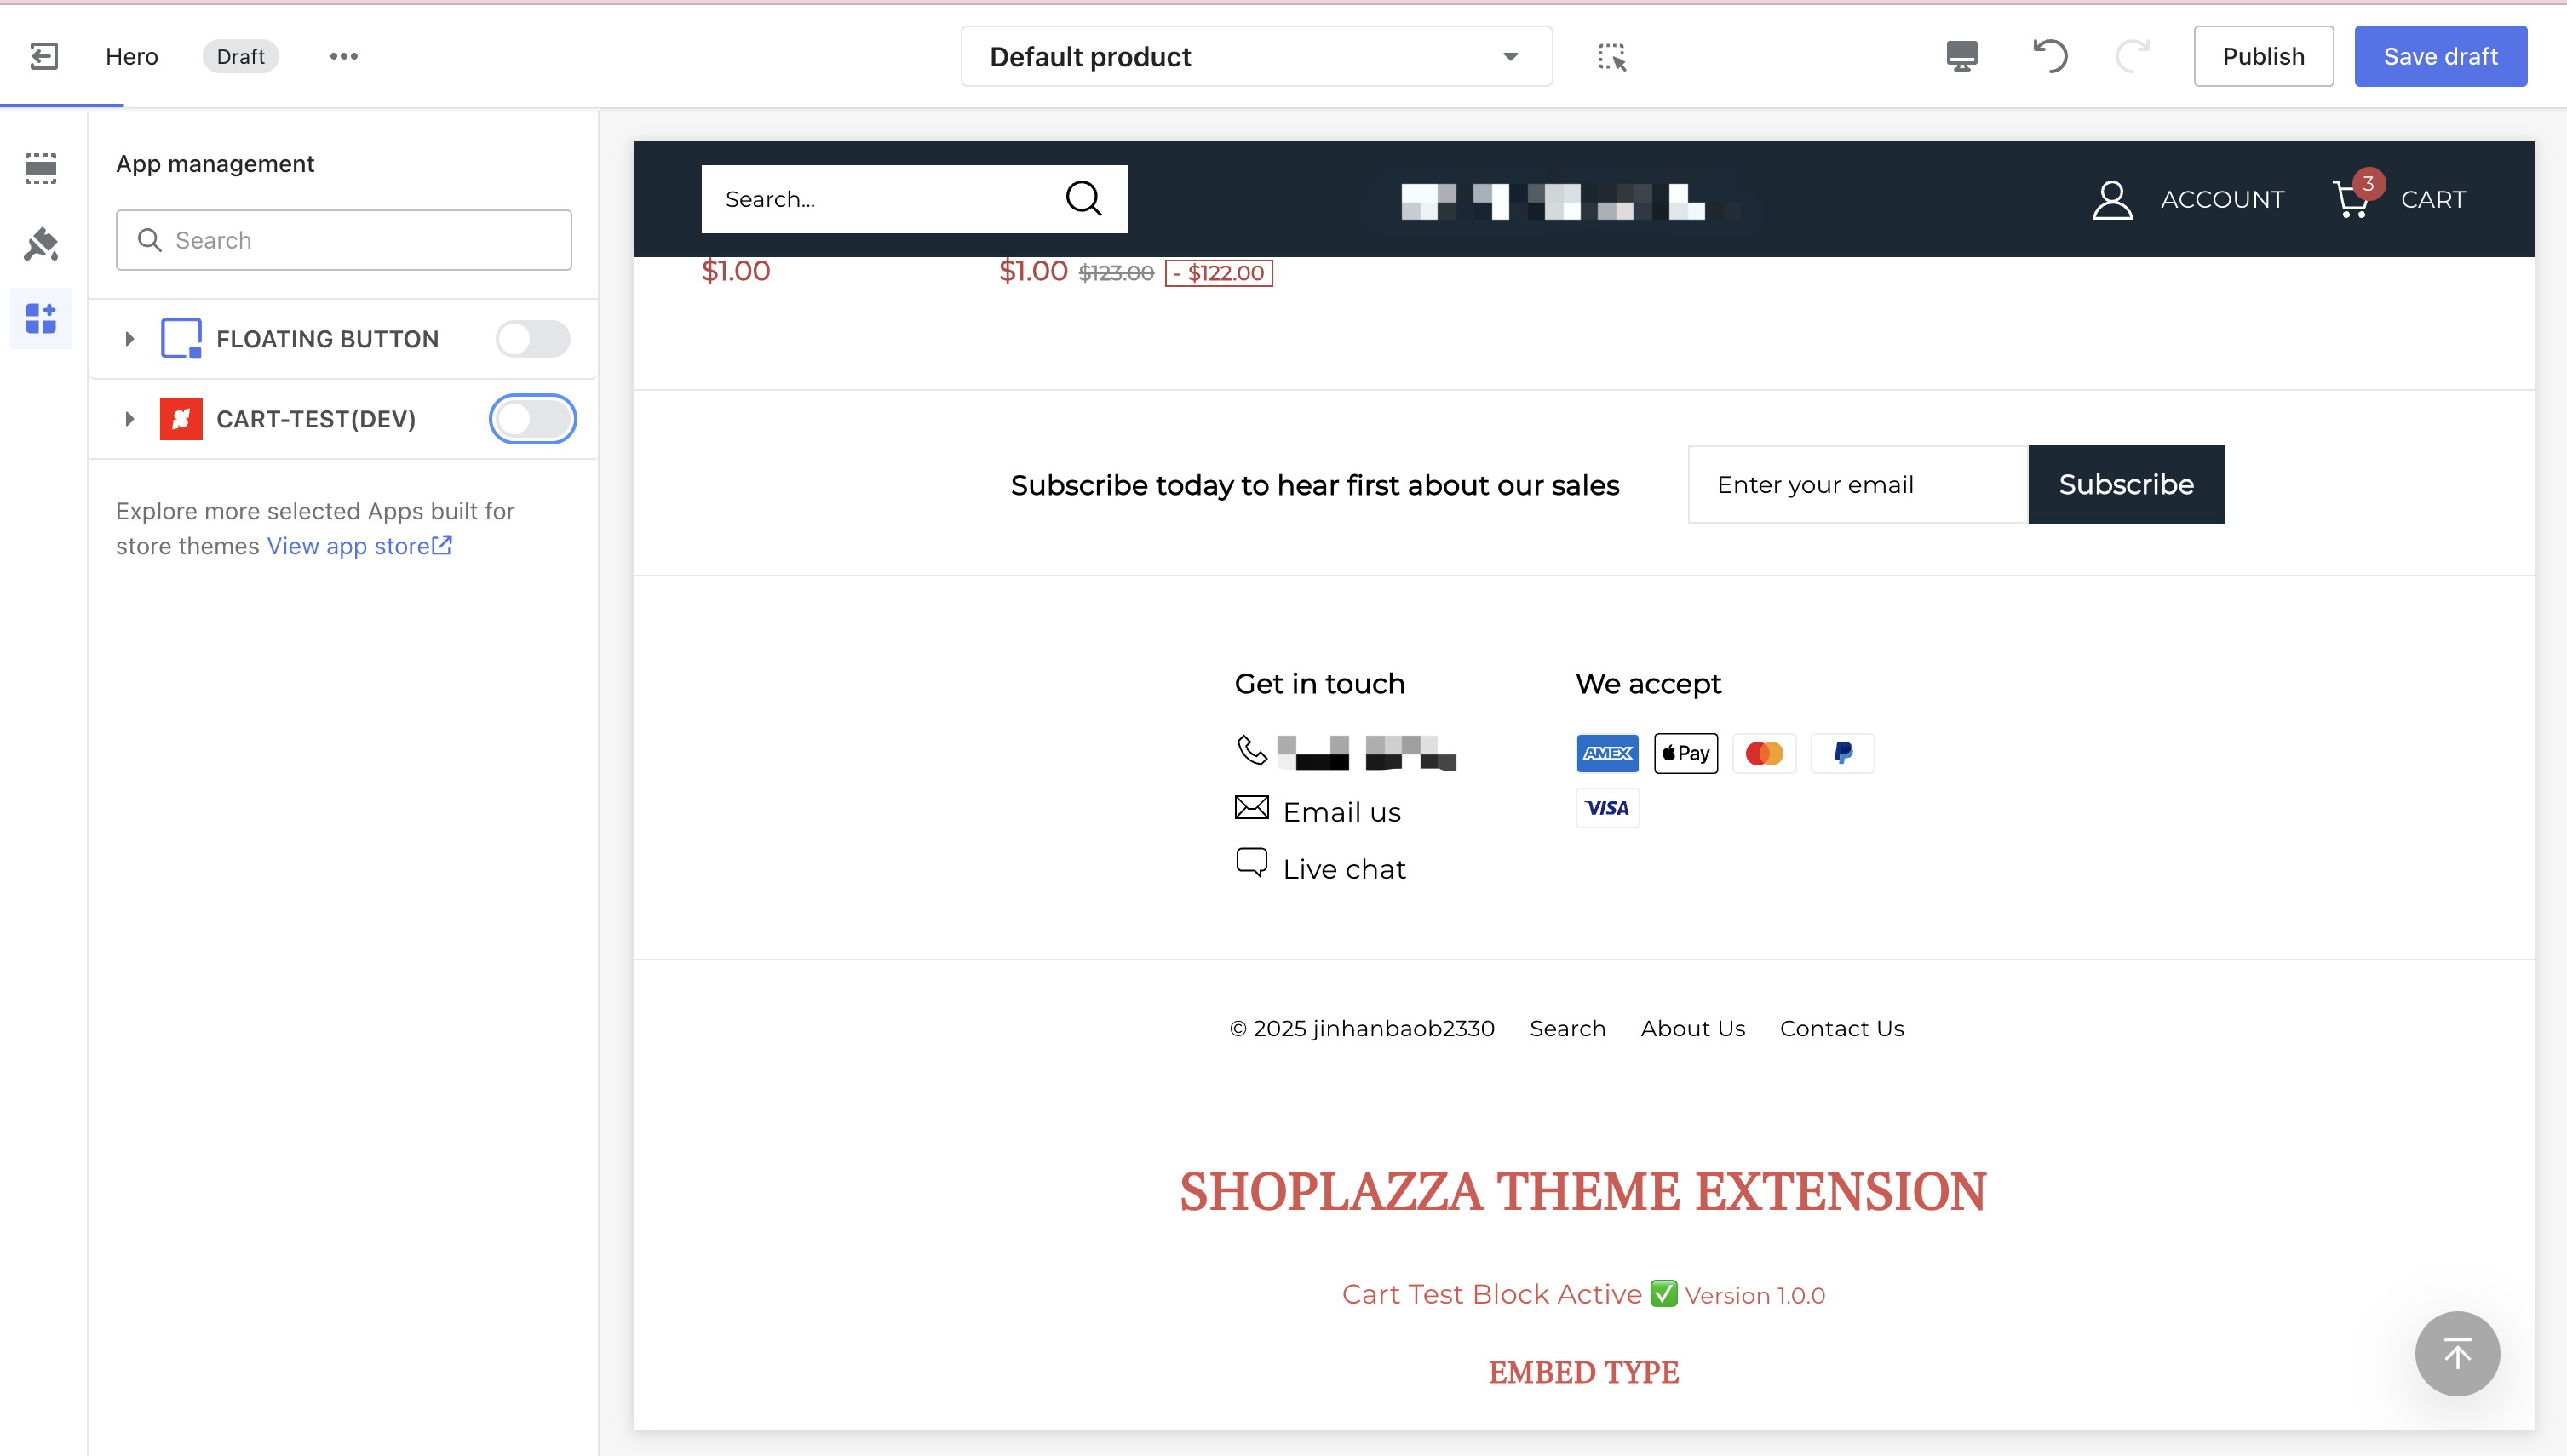
Embed (App Embed Block): it is disabled by default — turn it on under App Management first, then check the storefront.
-
-
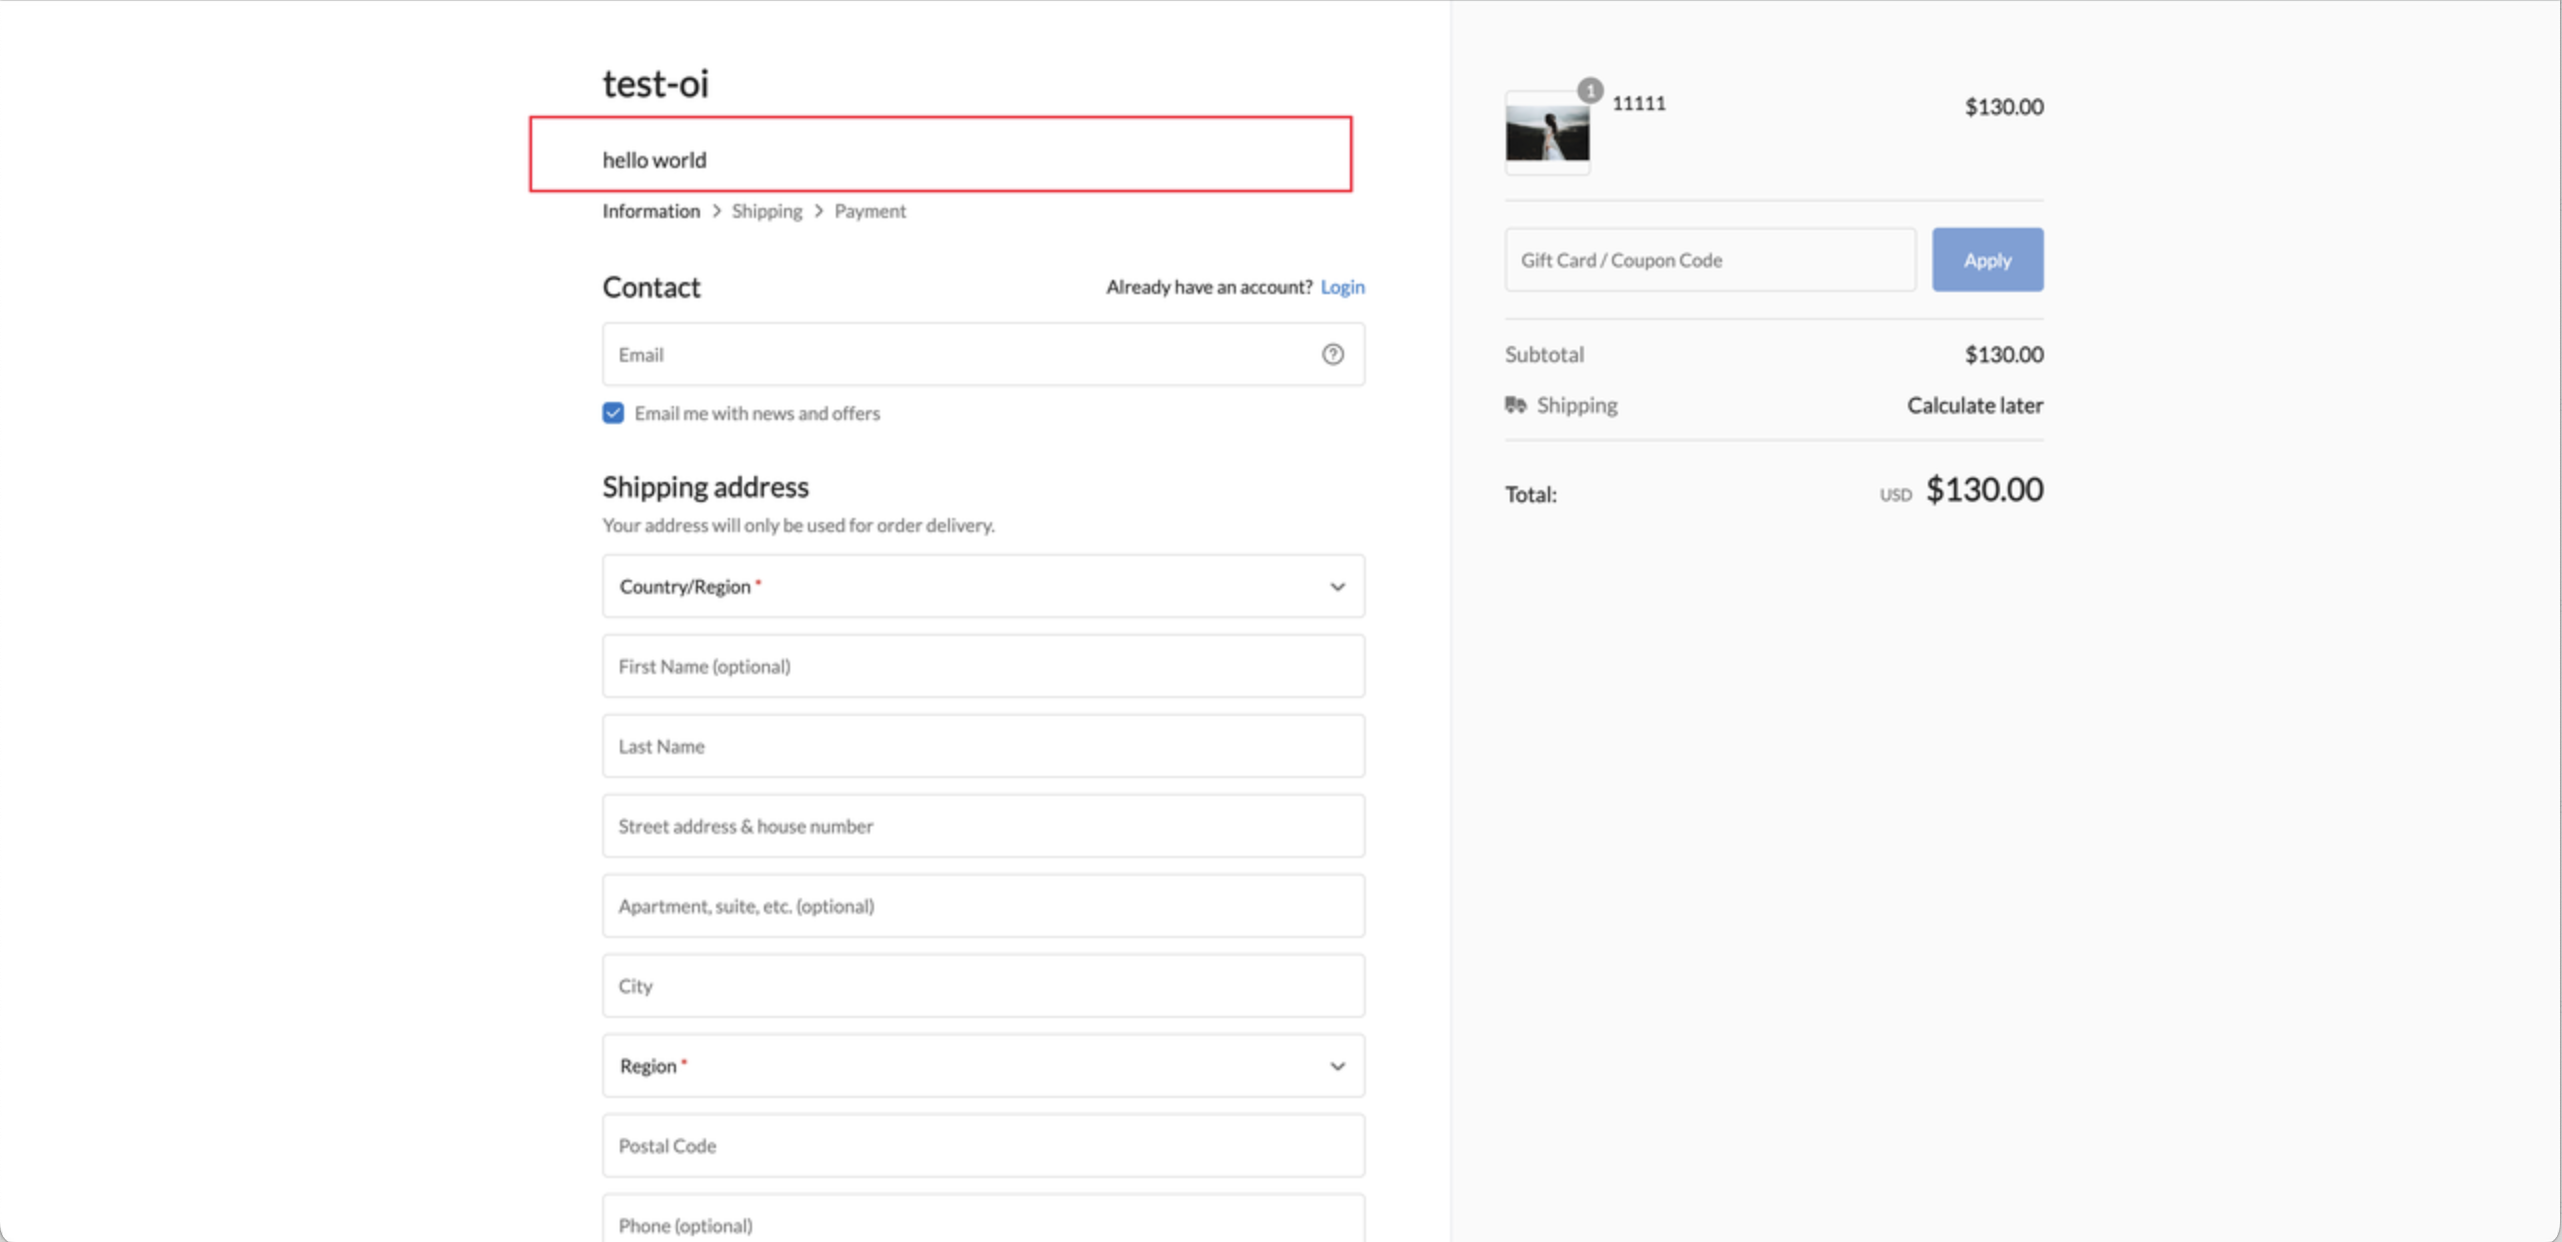
Checkout extension: open the storefront, proceed to the checkout page, and check whether your content is injected at the configured extension point.
-
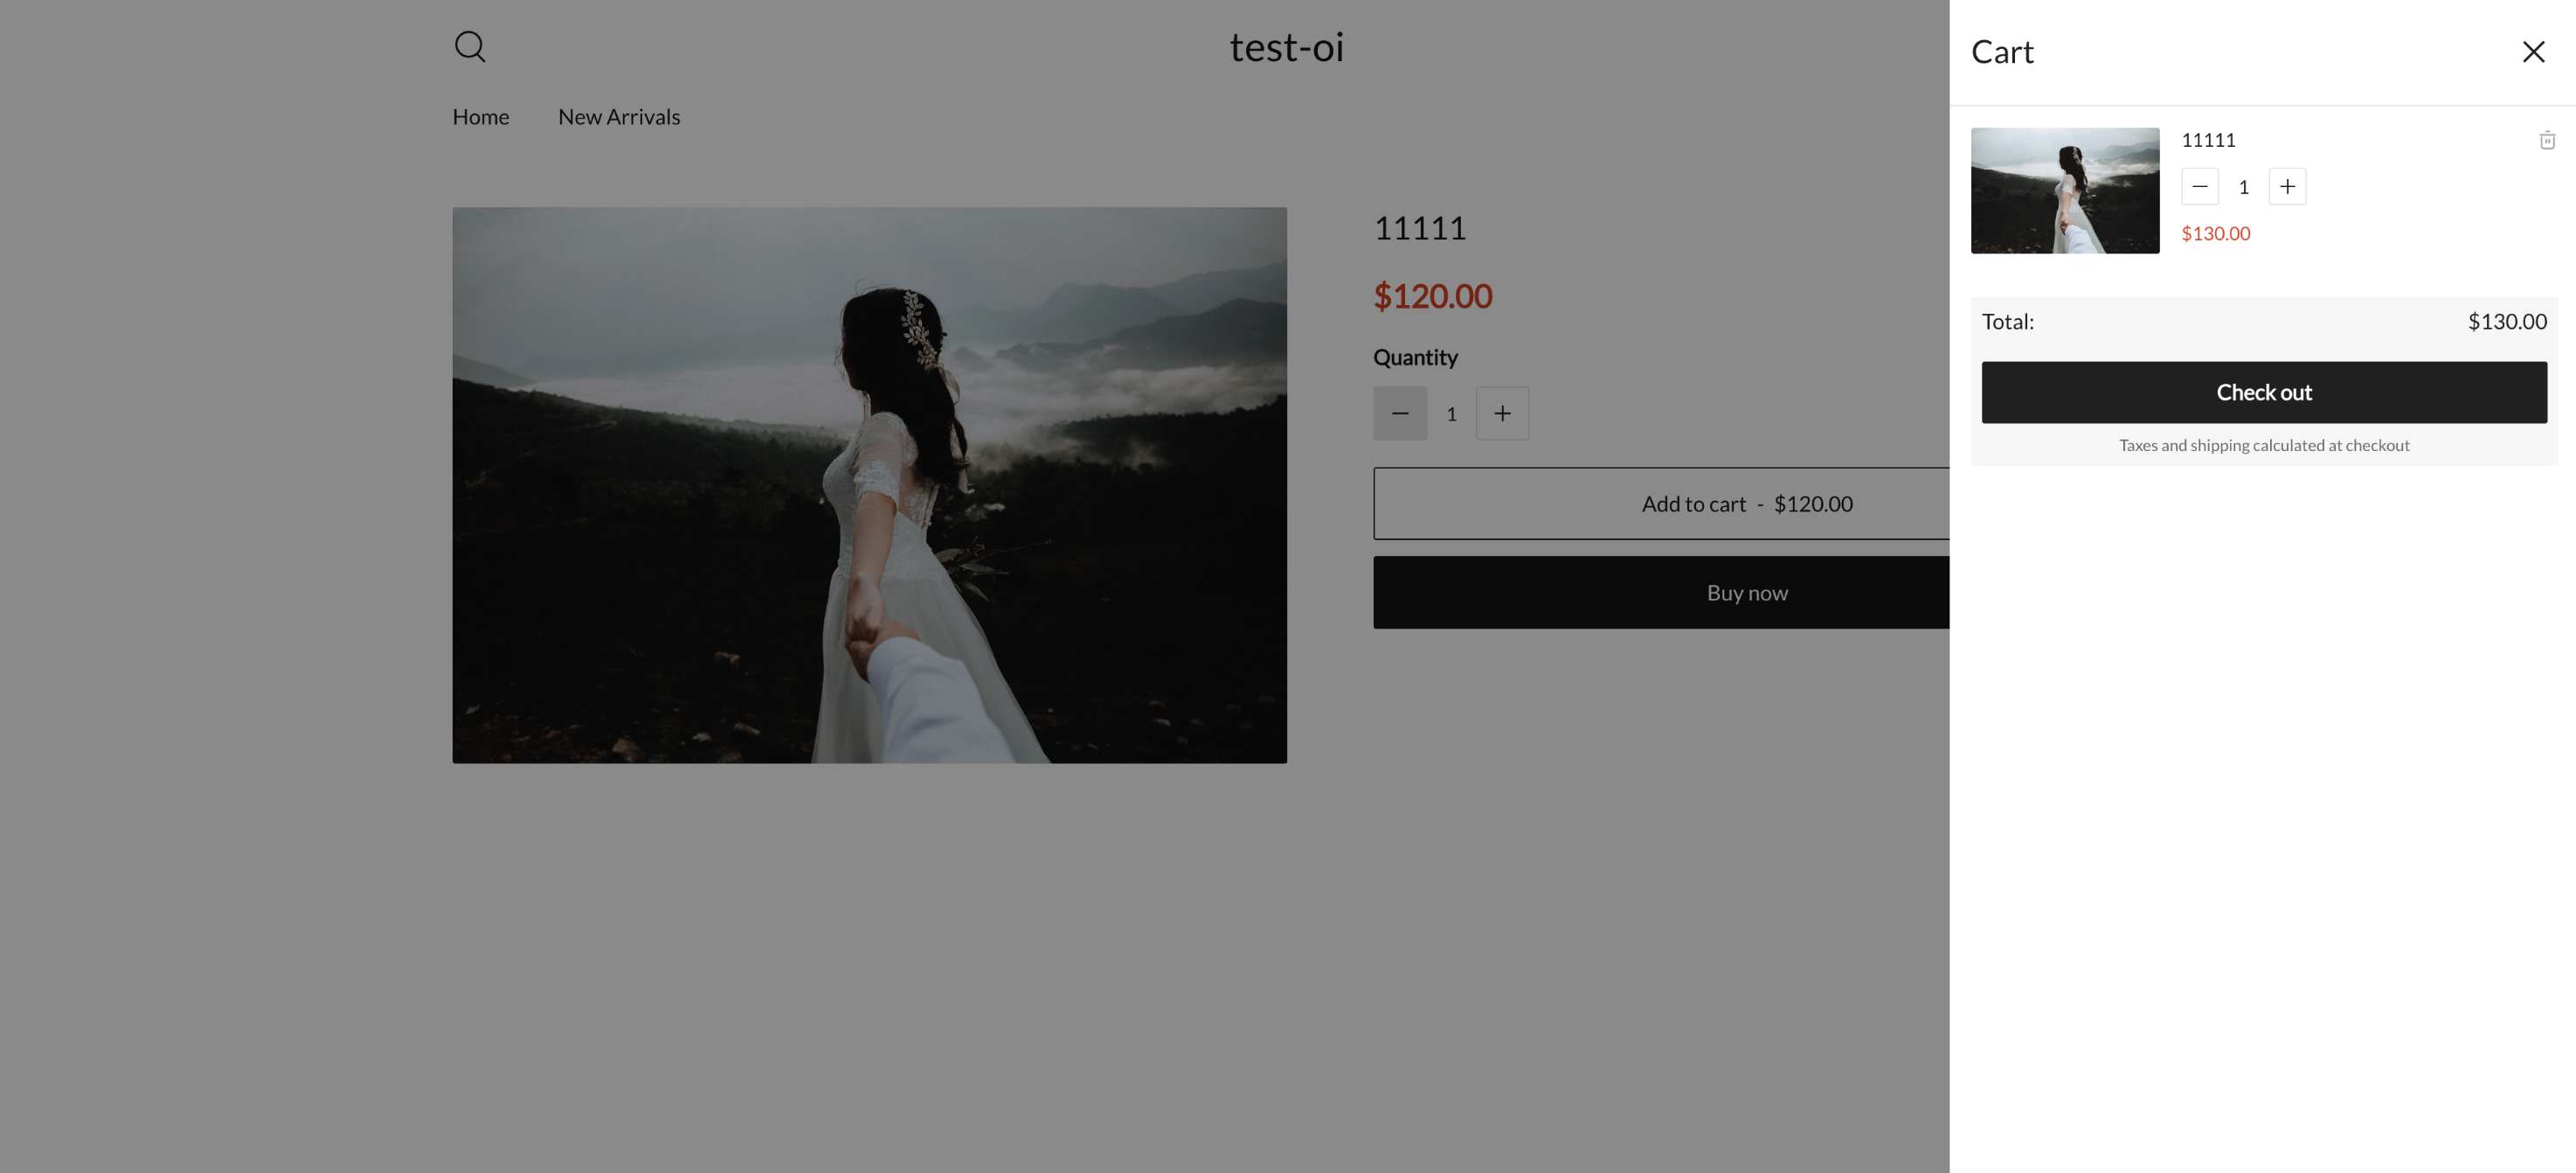
Function extension: open the storefront and perform an Add to Cart action, then check whether the price-modification function runs.
If an extension doesn't show up, see the troubleshooting sections in the theme extension guide and the checkout extension guide.
Next steps
Once your app works correctly in a development store, continue to Submit review.