Product merchandising
Bring products to your storefront from your app: create products with variants and images, organize them into collections, set inventory, and publish — all through the Open API.
A complete merchandising flow
A new product moves through these stages, and each step maps to one recipe:
- Create the product. Create it with options, variants, and images in one call — it starts as an unpublished draft. See Create and update products.
- Refine variants and images. Add variants or images incrementally, or look them up by SKU. See Manage variants and images.
- Organize it. Group the product into a manual or smart collection so shoppers can browse it. See Organize products into collections.
- Stock it. Set inventory per variant at a location. See Manage inventory.
- Publish it. Flip
publishedto true (or schedule it) so the product is visible on the storefront — back in Create and update products.
If an external system is your source of truth instead, mirror the catalog into it — see Build a product sync app.
Jump straight to any recipe:
Create and update products
Create, update, publish/unpublish, and delete products.
Manage variants and images
Add variants and images, and look them up by SKU.
Organize products into collections
Create collections and add products, manual or smart.
Manage inventory
Set and read inventory across locations.
Build a product sync app
Mirror a store's catalog into an external system.
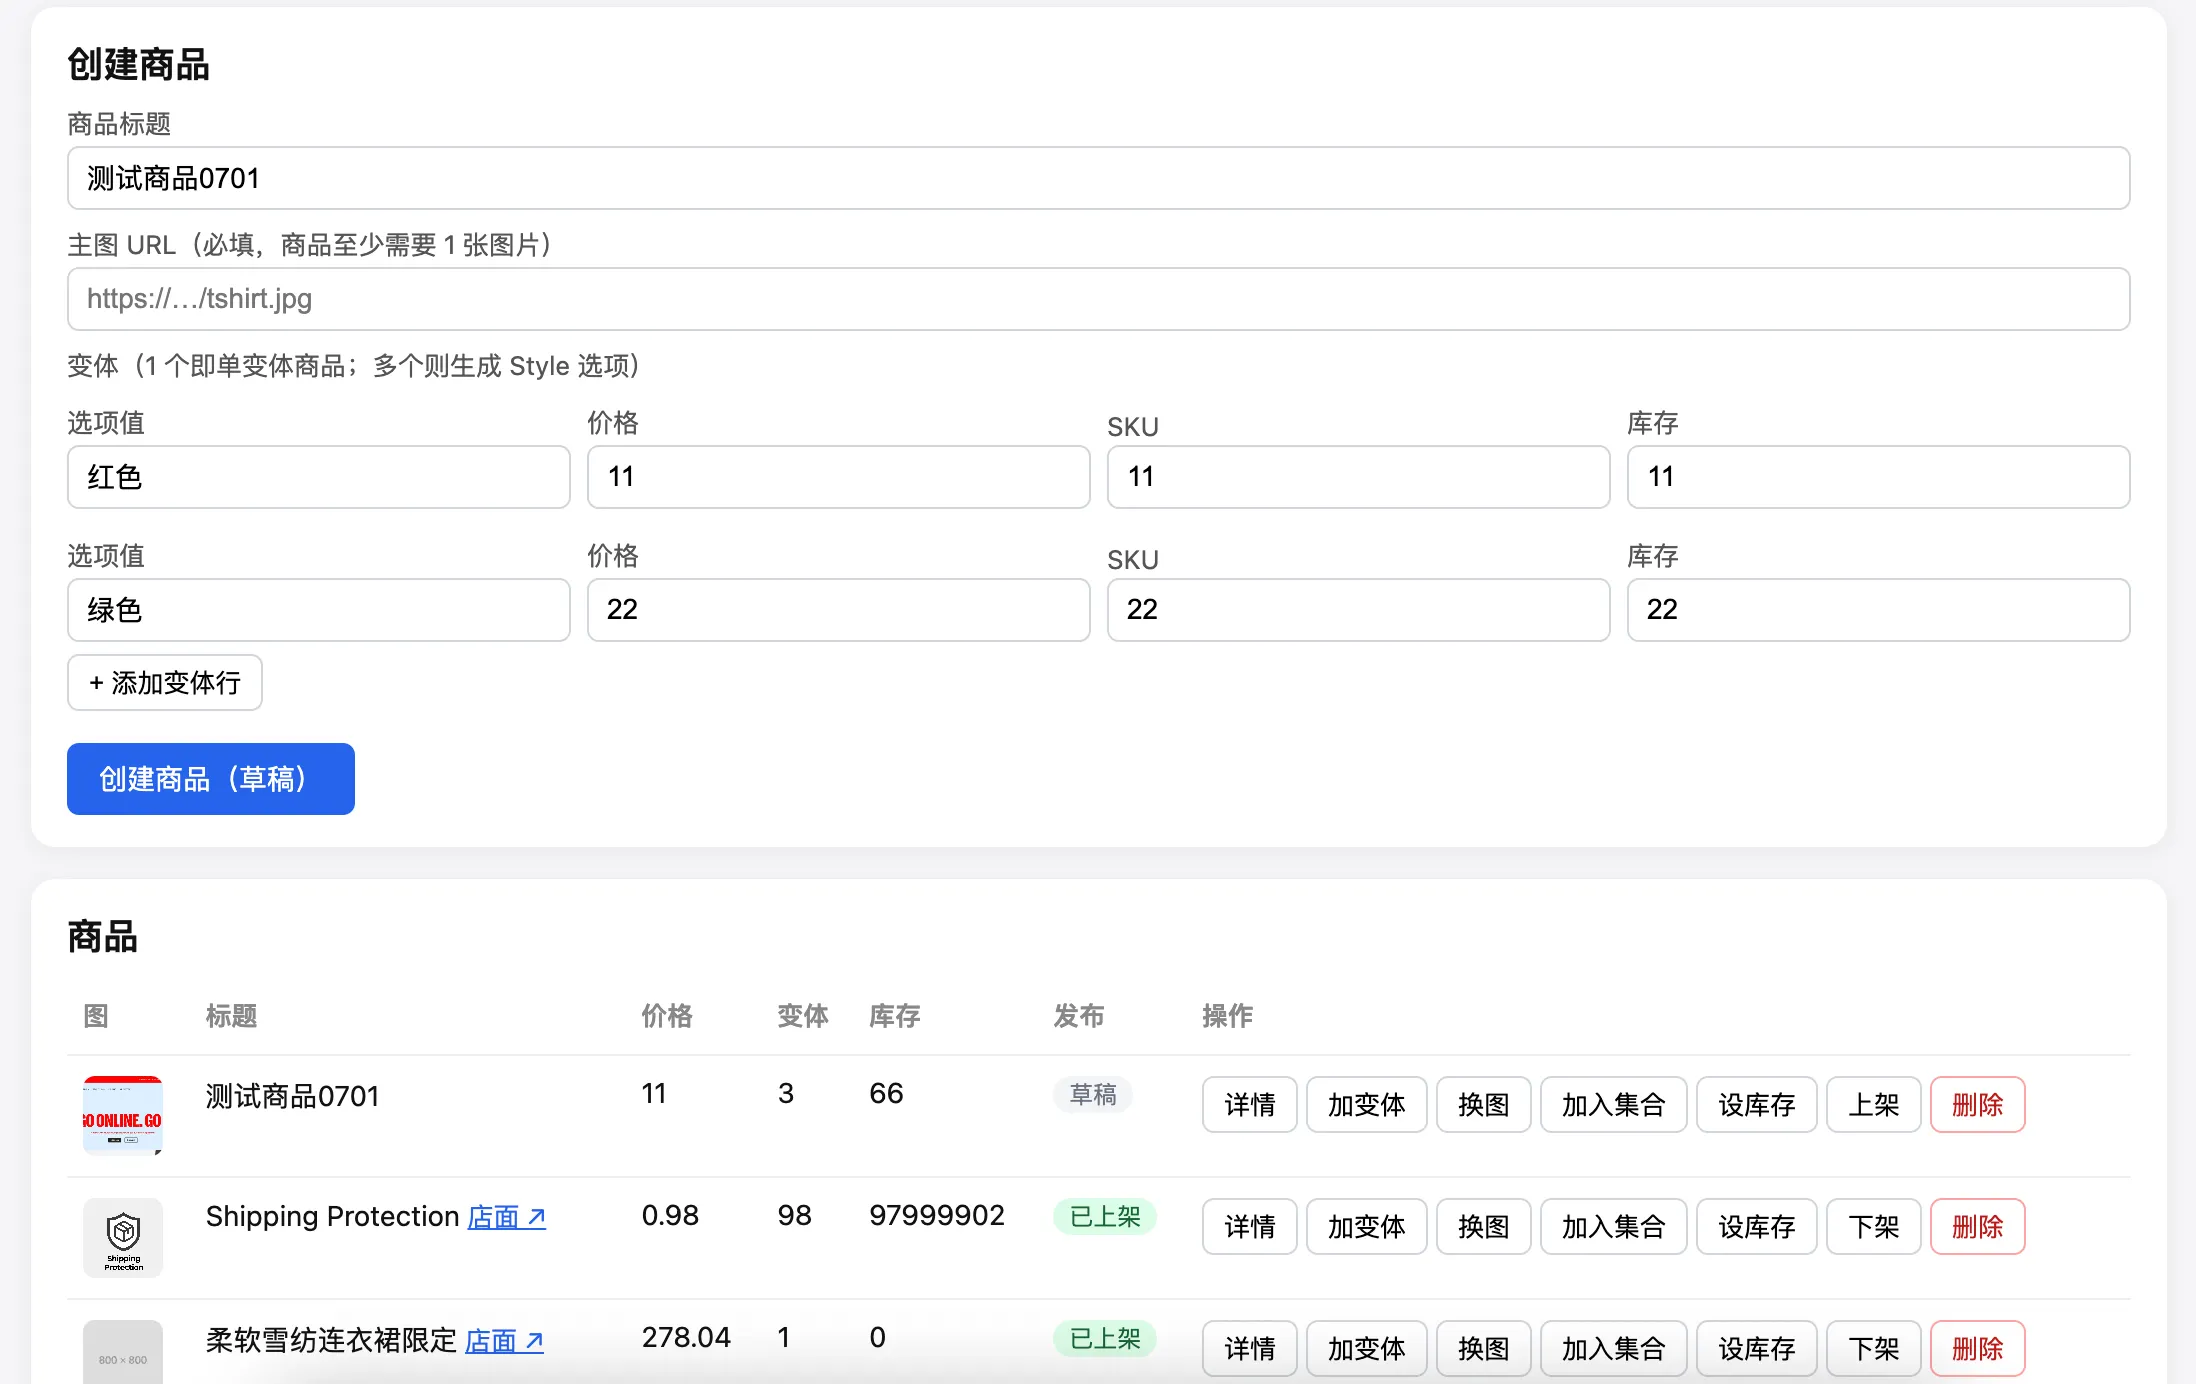
What you can build
Following the recipes above, you can build the demo app below: create a product with variants and images, organize it into a collection, set its inventory, then publish it to the storefront — all from your own backend.