Theme Extension Development Guide
Theme App Extension is a general extension mechanism for themes that allows app capabilities to be injected into the store theme as extensions. It typically consists of block files (blocks), asset files (assets), code snippets (snippets), and localization files (locales).
Theme App Extension supports two types of theme extensions:
-
Basic extension (App Block): Used to render content in the visual area of a page. Merchants can add it to a Section that supports
@appin the Theme Editor. -
Embed extension (App Embed Block): Used to inject global scripts, overlays, or capabilities into areas without a fixed layout. It is typically rendered before
</head>or</body>.
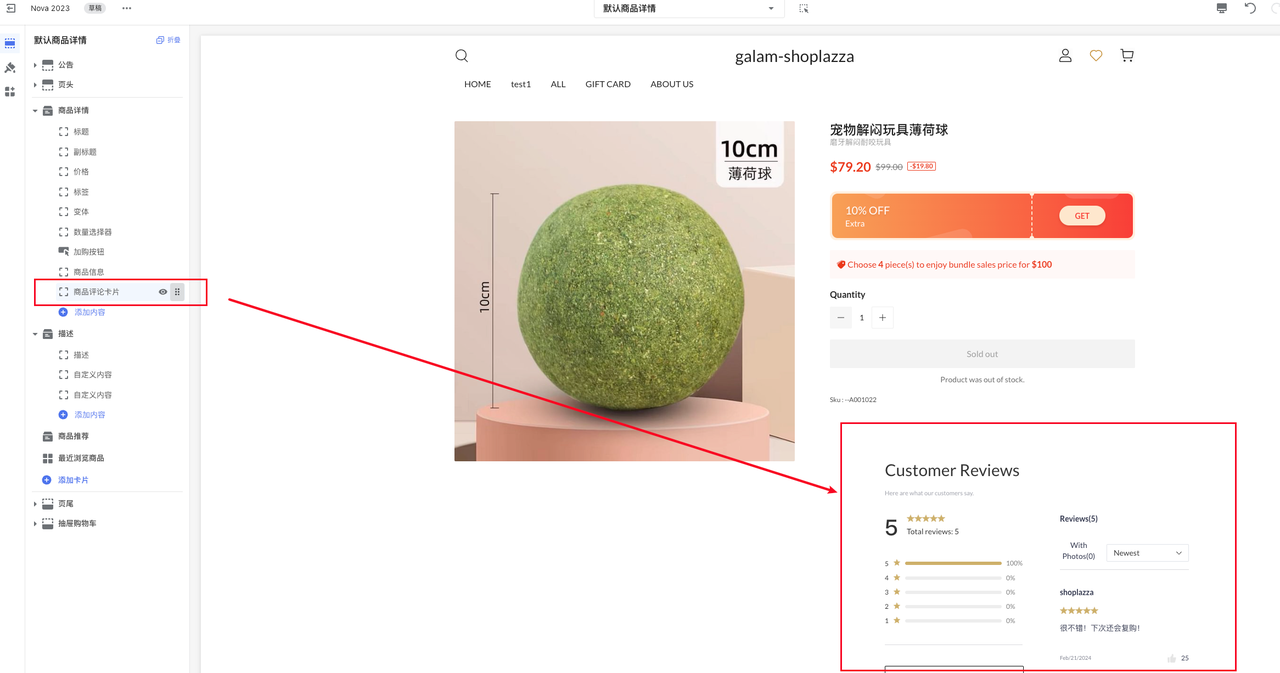
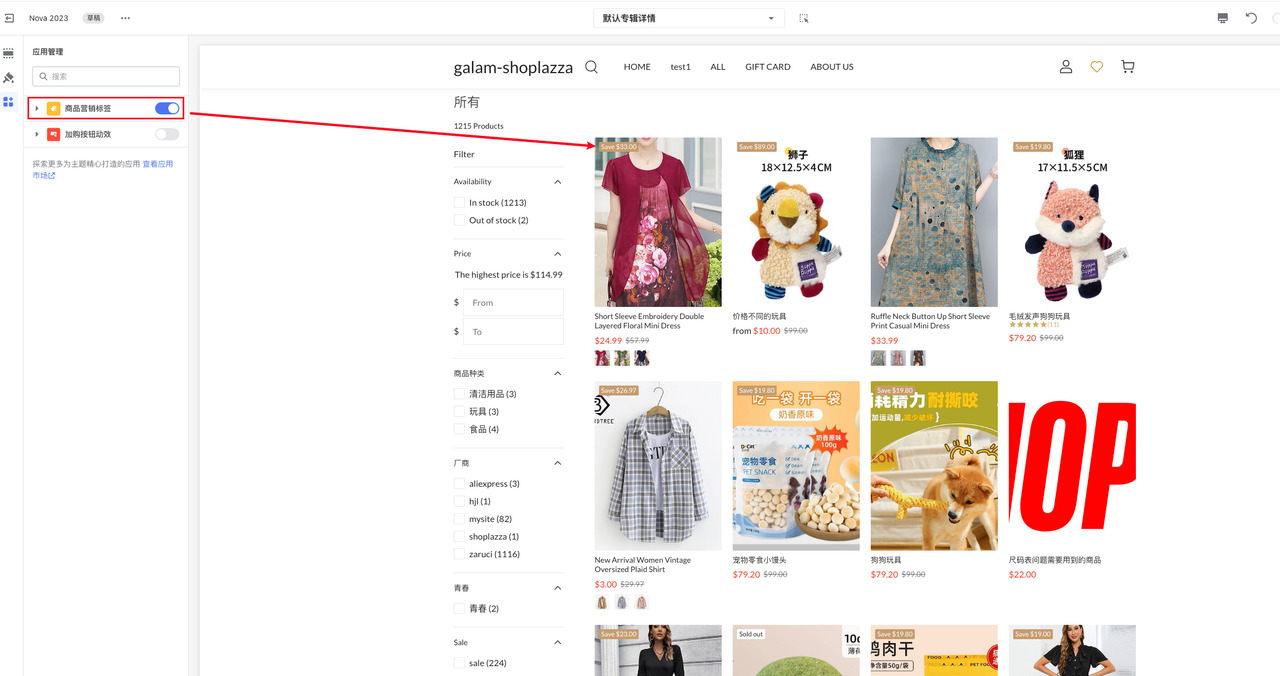
For the use cases, code structure, and Schema configuration of these two extension types, see the Theme extension reference.
What You'll Learn
-
How to initialize and create a Theme App Extension using the CLI
-
The differences between App Block and App Embed Block extension types and their applicable scenarios
-
How to write and preview a minimal working App Block
-
How to write, enable, and preview a minimal App Embed Block
Prerequisites
-
shoplazza-cli installed
-
A Shoplazza developer account and a test store
-
An existing shoplazza app project, or a working directory to develop in
Development Workflow
Step 1: Initialize
In the app project root directory (or an empty directory), run:
shoplazza app init --name "my-app"
This creates a new app named my-app and scaffolds its project as a subdirectory of the current directory.
If you built your app following Develop a standalone app, your project already has the CLI configuration — skip this step and continue from Step 2 in the project root.
Step 2: Create a Theme Extension
Enter the generated app directory and run:
shoplazza app extension create --type theme --name my-theme-app-extension --theme-type basic
This creates a basic theme extension named my-theme-app-extension in the extensions/ directory. Replace basic with embed if you need an App Embed Block instead. The directory structure looks like this:
my-app/
└── extensions/
  └── my-theme-app-extension/
    ├── assets/
    │   ├── my-theme-app-extension.css
    ├── blocks/
    │   ├── my-theme-app-extension.liquid
    ├── snippets/
    │   └── my-theme-app-extension.liquid
    ├── locales/
    │   ├── en-US.json
    │   └── zh-CN.json
    ├── package.json
    └── shoplazza.extension.toml
Develop your Theme Extension inside the extensions/my-theme-app-extension/ directory.
Step 3: Start Preview
During development, run the following command in the app directory:
shoplazza app dev
The extension is automatically published to the bound store. You can then add the App Block in the Theme Editor, or enable the App Embed Block under "Theme Editor > App Management".
The extension shows up in the Theme Editor only if its app is installed on the store. If you haven't installed it yet, follow Test app — if you haven't implemented the app itself, install via Scenario 1 there.
Directory Structure
After creating a Theme App Extension via the CLI, a complete directory structure with sample code is automatically generated under the extensions/ directory:
└── extensions/
    └── my-theme-app-extension/
        ├── assets/
        │   ├── app_block.css
        │   ├── app_embed_block.css
        │   ├── app_embed_block.js
        │   └── thumbs_up.svg
        ├── blocks/
        │   ├── app_block.liquid          ← App Block
        │   └── app_embed_block.liquid    ← App Embed Block
        ├── snippets/
        │   └── rating_stars.liquid
        ├── locales/
        │   ├── en-US.json
        │   └── zh-CN.json
        ├── package.json
        └── shoplazza.extension.toml
Subdirectory descriptions:
| Subdirectory | Description |
|---|---|
assets/ | Stores static resources such as CSS, JavaScript, and images. Assets are served via the Shoplazza CDN. Reference them in Liquid using the {% use %} tag or asset_abs_url filter. |
blocks/ | Stores Liquid files for App Blocks and App Embed Blocks. Each file corresponds to an independent block. |
snippets/ | Stores reusable Liquid code snippets. They can be referenced in multiple blocks using {% render %} or {% include %}. |
locales/ | Stores multilingual JSON files for internationalizing storefront text. |
shoplazza.extension.toml | The extension configuration file containing the extension ID, name, and type. The scaffolding maintains this file automatically; you do not need to modify it manually. |
For detailed configuration of each file, see the Theme extension reference.
A Minimal App Block Example
Create a new file under blocks/ with the simplest renderable block so that merchants can add it in the Theme Editor and see the result:
<div class="my-app-block">
  {{ block.settings.text | default: "Hello from app block" }}
</div>

{% schema %}
{
  "name": {
    "en-US": "My App Block",
    "zh-CN": "我的区块"
  },
  "settings": [
    {
      "type": "text",
      "id": "text",
      "label": { "en-US": "Text", "zh-CN": "文本" }
    }
  ]
}
{% endschema %}
For complete Block types, Schema, asset references, and multilingual support, see the Theme extension reference.
A Minimal App Embed Block Example
Unlike an App Block (rendered inside a section), an App Embed Block injects global content before </head> or </body>. Its Schema must declare target ("body" or "head").
Edit blocks/app_embed_block.liquid with a minimal renderable embed:
<div class="my-app-embed">
  {{ block.settings.text | default: "Hello from app embed" }}
</div>

{% schema %}
{
  "name": { "en-US": "My App Embed", "zh-CN": "我的全局嵌入" },
  "target": "body",
  "settings": [
    {
      "type": "text",
      "id": "text",
      "label": { "en-US": "Text", "zh-CN": "文本" }
    }
  ]
}
{% endschema %}
App Embed Blocks are disabled by default. After shoplazza app dev publishes the extension, the merchant must turn it on in the Theme Editor under Theme Editor > App Management — otherwise nothing renders on the storefront.
For the full Schema (including target), asset references, and a complete floating-button example, see the Theme extension reference.
Next Steps
-
Check the configuration guide: See the Theme extension reference
-
Guide merchants to install your extension: See Guide merchants with deep links
-
Develop a checkout extension: See Create a checkout extension
-
Verify the app and extension end to end: See Test app
Troubleshooting
My App Embed Block doesn't run on the storefront
Problem: The App Embed Block has no visible effect on the storefront.
Cause: App Embed Blocks are disabled by default after installation.
Solution: Enable it in the Theme Editor under Theme Editor > App Management.
My App Block doesn't appear on the page
Problem: The App Block isn't visible after publishing.
Cause: App Blocks are not inserted automatically; merchants must add them manually.
Solution: In the Theme Editor, add the block to a section that supports @app.