Create app
Prerequisites
You've completed App types and decided to build a public app.
Create app
Shoplazza requires a public app to complete OAuth 2.0 Authentication before it can use Shoplazza Open API resources. Therefore, during the app development phase, you need to create a public app.
- Log in to your partner account and navigate to the Partner dashboard. Select the “Apps” option from the left-hand panel and then click on the “Create app” button.

- Here you will add the App name and click Create.
The APP name serves as the representative of the application entity and is the unique identifier used by the system during backend processing logic. This name is typically not displayed in the app market or the app installation list in the store.
- Once the App is created, your Client ID & Client Secret will be generated automatically and can be accessed from the App settings page.

App Setup
Before you can test your App on your development store, you need to add a Redirect URL to the App setup so that you can Run validate to unlock Testing.
- To add the Redirect URL, click Setup under the App setup.

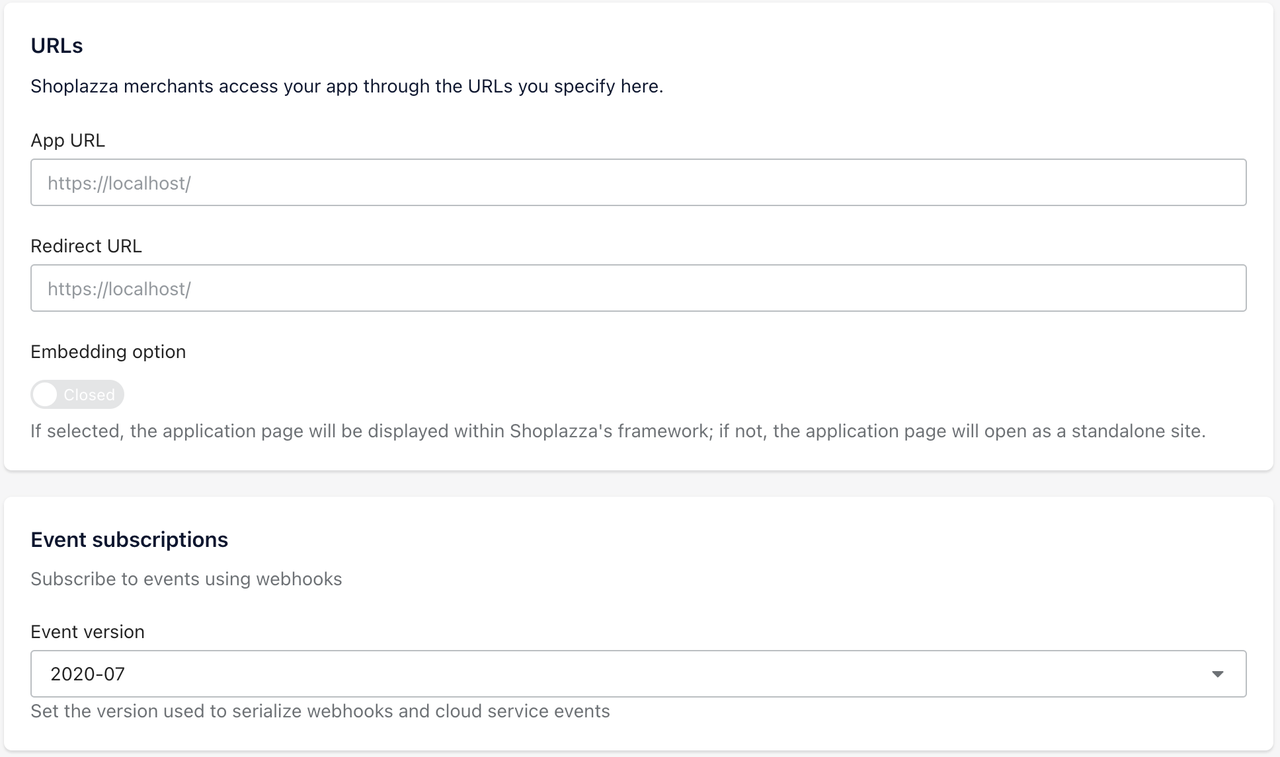
- Here you can add the App URL and Redirect URL.


-
App URL (app entry point): The first URL a merchant reaches when installing or opening your app, and the starting point of OAuth. Shoplazza's request to this URL carries parameters such as
shop,store_id, andhmac. Your backend verifies thehmac, then checks whether the store has already authorized the app: if not, it redirects the merchant to the authorization page; if so, it takes them straight into the app. For example:https://your-app.example.com/auth. -
Redirect URL (authorization callback): After the merchant approves on the authorization page, Shoplazza redirects back to this URL with the authorization code
code(plusstateandhmac). Your backend verifies the request and exchangescodefor anaccess_token, which completes the installation. For example:https://your-app.example.com/auth/callback. See OAuth authentication for the full flow.
- Both the App URL and the Redirect URL must use HTTPS.
- The Redirect URL must exactly match the
redirect_uriyour code sends in the authorization request, including the path and any trailing slash. Otherwise, authorization fails.
-
Embedding option: When on, your app's pages open inside the Shoplazza admin (in an iframe); when off, they open as a standalone site. See App types for how the two differ.
-
Event subscriptions: An event is a kind of notification. Once you subscribe, Shoplazza pushes a message to your app through a webhook whenever the relevant business state changes (for example, an order is created or a product is updated), so your app can respond promptly. The event version sets which API version the payloads are serialized with. For what each event means and its minimum version, see Supported Webhook Events.
-
Supported countries: The countries and regions whose merchants can see the app. Defaults to Worldwide.
Manage Listings
The App listing will be displayed in the App store where merchants can learn more about the app features and installation.It is multilingual and currently only supports English and Chinese.
- From the Apps setting page, go to App listing Manage listings.

- Click Start listing to add the required information.

- On the listing page, you can add Basic App information, Listing content, Pricing details, and Support and resources.

-
App Listing Name: The name used for displaying the app in the app marketplace, which is seen and used by merchants, and has multilingual capabilities. In contrast, the App Name is for developers to manage the app and serves as the unique identifier for information transmission of the app within the system.
-
Listing content: This feature serves as a comprehensive introduction to your application, presented in the app marketplace for merchants to view. HTML code can be incorporated within the detailed description to enhance its visual appeal. Utilize the “Preview” function to visualize how the app will appear in the marketplace.

- Pricing details: Select a billing model.
Pricing Configuration Guide
Each app can use only one billing model, and it can't be changed after the app first passes review. Choose the model that matches how your app actually charges:
| Billing model | How merchants pay |
|---|---|
| Free | No charges of any kind. |
| Free to install | Free to install; usage is charged separately as the app is used (for example, $1 per 100 emails). The billing cycle is customizable. |
| Recurring charge | A subscription fee charged every billing cycle, with multiple plans available. You can also add usage-based charges on top of the subscription fee. |
| One-time payment | The merchant pays once; no further charges apply. |
See Integrate app billing for how to implement each model.
1. Free Model
2. Free to Install Model

3. Recurring Charge Model

-
Subscription Only

-
Subscription + Usage

4. One-Time Charge Model

Next steps
With your app's Client ID, Client Secret, and redirect URLs configured, continue to Develop a standalone app to scaffold the project and implement OAuth.