CLI quick start
Shoplazza CLI is a command-line tool that helps you build Shoplazza themes. It lets you preview, test, and share changes to themes while developing locally.
This tutorial covers both scenarios with one CLI workflow: creating a brand-new theme from a reference theme, and customizing an existing merchant theme. Pick the path that fits your goal in Step 2; the remaining steps are shared.
What you'll learn
After you've finished this tutorial, you'll have accomplished the following:
- Set up your local development environment
- Got theme code, either by cloning Nova 2023 or downloading a merchant's theme
- Previewed your changes with the store's data
- Pushed theme code to a store and published the theme
Requirements
- The URL of the store that you want to work on, such as
your-store.myshoplaza.com.
Installation requirements for Shoplazza CLI
The requirements to install and run Shoplazza CLI depend on your computer:
Step 1: Install Shoplazza CLI
Follow the instructions below to install Shoplazza CLI on macOS, Windows, or Linux.
npm install -g shoplazza-cli
Step 2: Get your theme code
Choose the path that matches what you want to do.
Option A: Create a new theme
Use shoplazza themes init to clone the Nova 2023 Git repository to your local machine.
- In a terminal, navigate to the working directory where you want to clone Nova 2023.
- Enter the following command:
shoplazza themes init
- You're prompted to enter a name for your theme, such as
new-theme. The theme is cloned into a folder with the same name. - After the theme is cloned, navigate to the folder:
cd "new-theme"
After initializing your theme, run shoplazza auth login to log in with your store account.
- Enter the following command:
shoplazza auth login
- The terminal will ask you to enter the store link, enter your store URL (Eg.
https://ears.myshoplaza.com/). - After entering the URL, an authorization login page will automatically open in the browser, click Authorize Login.
- After the authorization is successful, the authorization success message will be displayed on the page:

Option B: Customize an existing merchant theme
📘 Prerequisite
Before you can pull and log in, you must request access to the merchant's store. Working on a theme in a merchant's store lets you test it with the merchant's products and other resources. You can also access themes using other accounts and credentials. Learn more
If you don't have a theme locally, then you need to download a copy of the theme code to work on it locally.
- Run the following command to retrieve a list of all of the themes in the store.
shoplazza themes pull
- Select a theme from the list. Its contents are downloaded to the current folder or the specified folder.
📘 Tip
If you haven't done so already, you're prompted to log in to Shoplazza when you run the
pullcommand. Make sure that you log in using the account that was granted access to the store. If you're already logged in with an account that doesn't have appropriate access, then you can log out usingshoplazza auth logout.
After you've downloaded the merchant's theme, you can make any necessary changes to the theme code. For example, you can adjust the theme's CSS to change its appearance.
Step 3: Start a local development server
After you get your theme code, you can run shoplazza themes serve to interact with the theme in a browser. Shoplazza CLI uploads the theme as a development theme on the store that you're connected to.
The command returns a URL that hot reloads local changes to CSS and sections, allowing you to preview changes in real-time using the store's data. This preview is only available in Google Chrome.
- To serve your theme, run the following command.
shoplazza themes serve
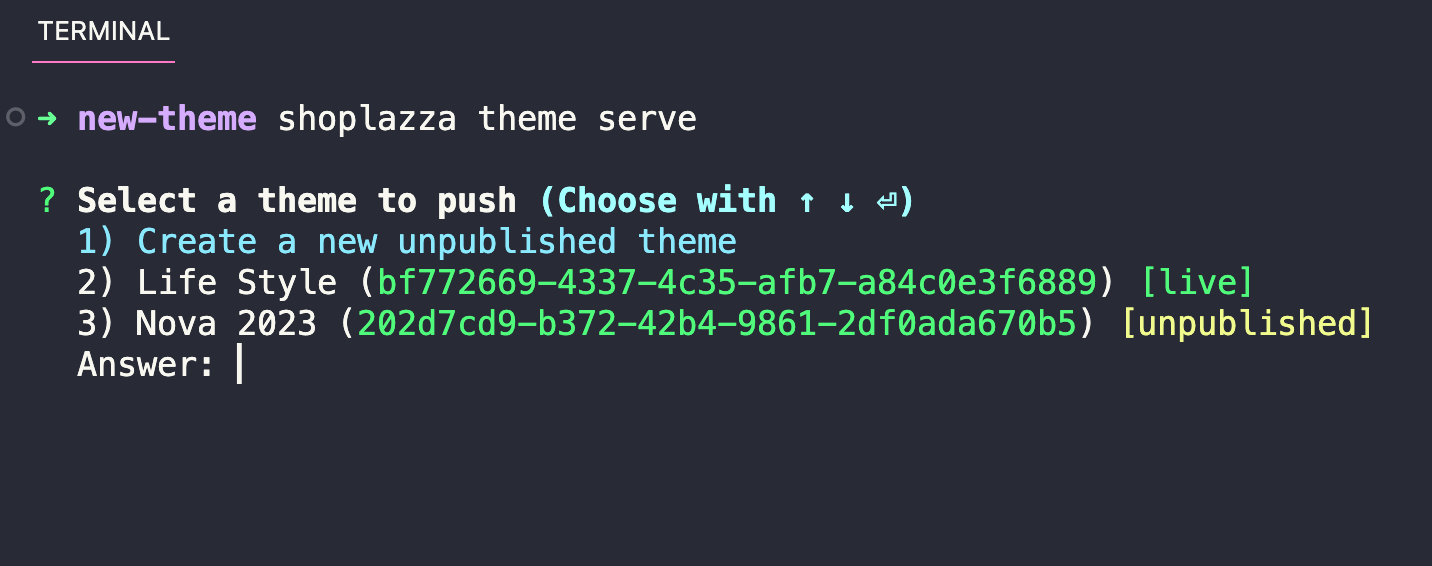
- The following image shows the theme selection. If you created a new theme (Option A), select
Create a new unpublished themeto start a new theme for development. If you're customizing an existing theme (Option B), select the theme you pulled instead.
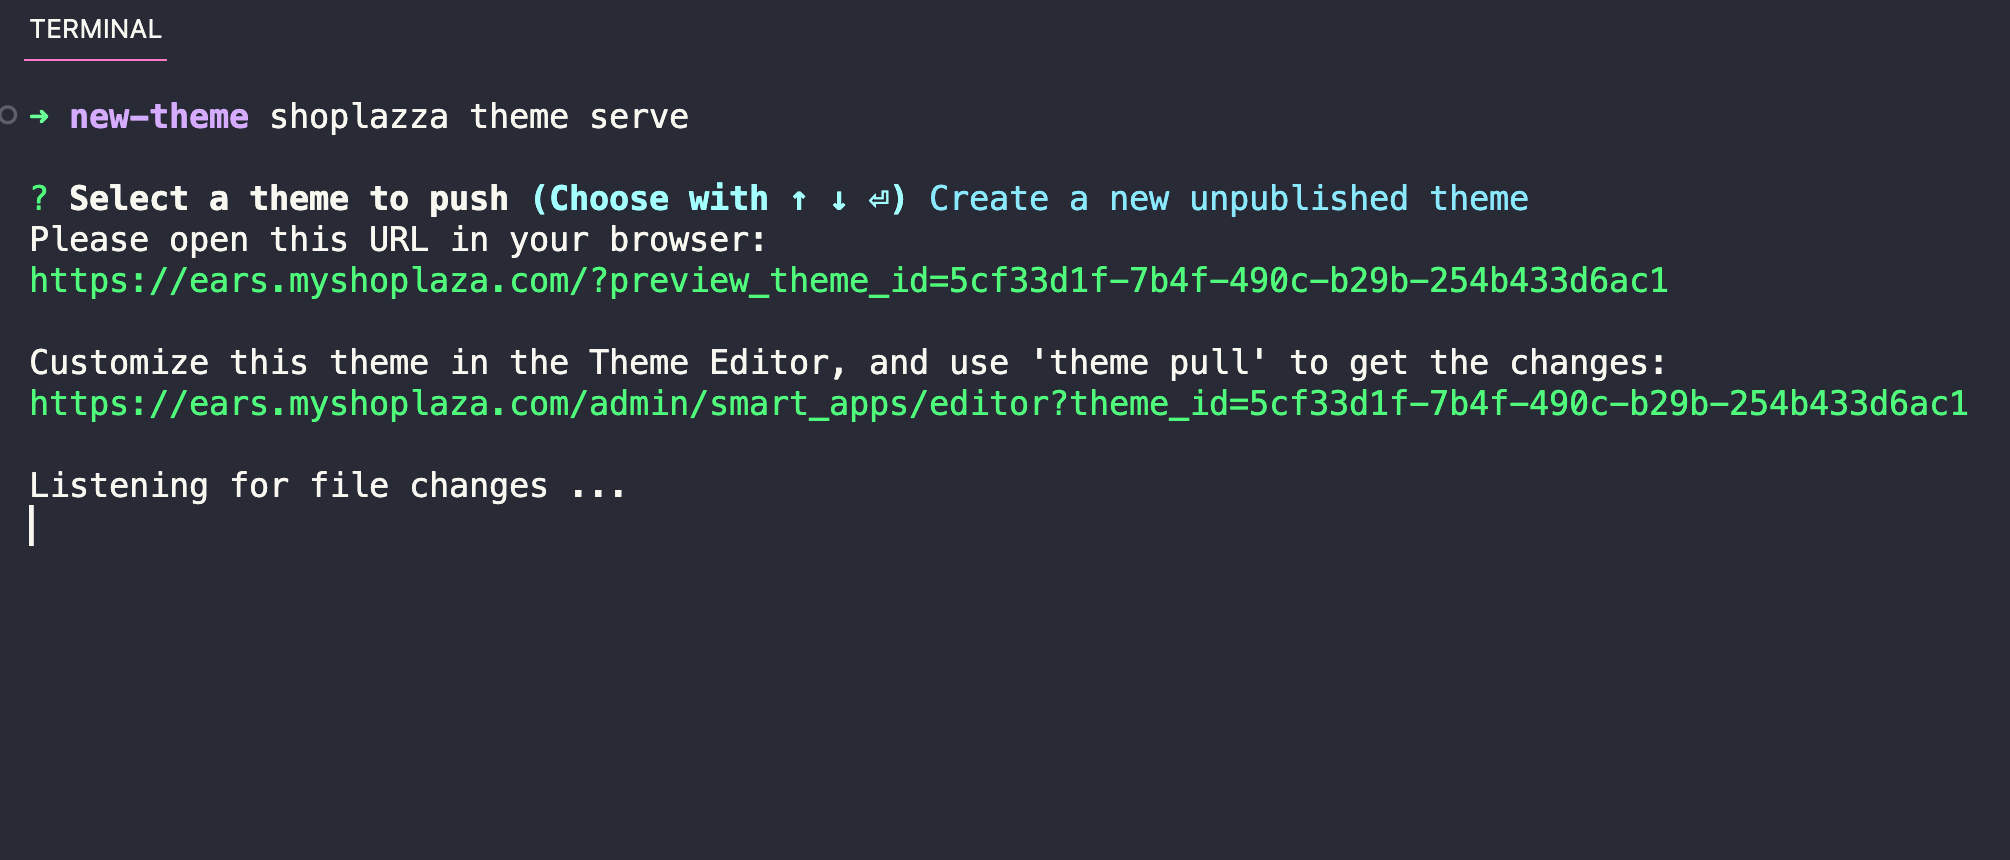
- The following image shows a development server is started using the
serve:
📘 Note
You can also use the
serveto generate a preview link and a link to the theme editor for the development theme.
Step 4: Push your theme
If you want to share a permanent link to your theme, update the code of an existing theme, or prepare for your theme to be published, then you need to push your theme code to Shoplazza using the theme push command. You're prompted to select the theme that you want to update.
The first time you push your theme code, you might want to upload the theme to your theme library as a new, unpublished theme. You can run the command and select Create a new unpublished theme.
shoplazza themes push
Step 5: Publish your theme
If you want to make your theme live on the store, then you can publish it using the theme publish command. Before you run this command, make sure that you've pushed all of your local changes to Shoplazza using the theme push command.
- Enter the following command:
shoplazza themes publish
- Select the theme that you want to publish from the list.
- Select
Yesto confirm that you want to publish the specified theme.
The theme is published and is now the active theme for the store.
Next steps
Creating or customizing a theme with Shoplazza CLI is only the first step in building your theme. Consider the following next steps:
Learn more about Shoplazza themes
- Explore the architecture of a theme. Learn more about the structure of a theme, and the role of each file and folder, in our architecture documentation.
Implement features
You can enable certain Shoplazza features or add functionality to your theme. Features fall into the following categories: